Daily Doodles

At the moment, and for the foreseeable future, I’m doing something called Daily Doodles. That means that I’m creating one new piece of lettering, sometimes in ink, usually in pencil, always in a day. Last week I wrote a little about it as an addendum to my Create Create Create post. This week, I started putting a bit more time and thought into the pieces – not necessarily in the execution of each, as a day isn’t a long amount of time to create something, but in the exploration of styles, and composition. Sometimes I get so carried away with finding new styles to use in lettering pieces that I don’t ever spend enough time actually exploring a style before I move onto the next. It’s partially due to curiosity about the possibilities, but also due to not wanting to produce things that seem too lacking in variety.

They say that it takes 10 000 hours to become good at something. And that’s a lot of hours. A lot of time doing the same thing over and over again, rehashing, going over, trying again, failing, and learning what to do better next time. Because of that, I decided that using my time doodling a new piece each day would be well spent not only exploring new styles, but exploring styles I’ve used before. Here are a few from the last week:

Air

Air: practising Roman capitals, the root of the letter forms we use today. Though originally a form of calligraphy, the historical records of them are stone engravings. The letters are still written today, however, with broad edged pens and brushes, and hold a lot of mysteries. Unlike learning some Italic or Gothic script, Romans require some difficult techniques to pull off through calligraphy. Sketching them, of course, is easier, providing you know how they are meant to be formed. (Let me give you a hint: that’s the hard part. Hence the practise.)

Beauty in Truth

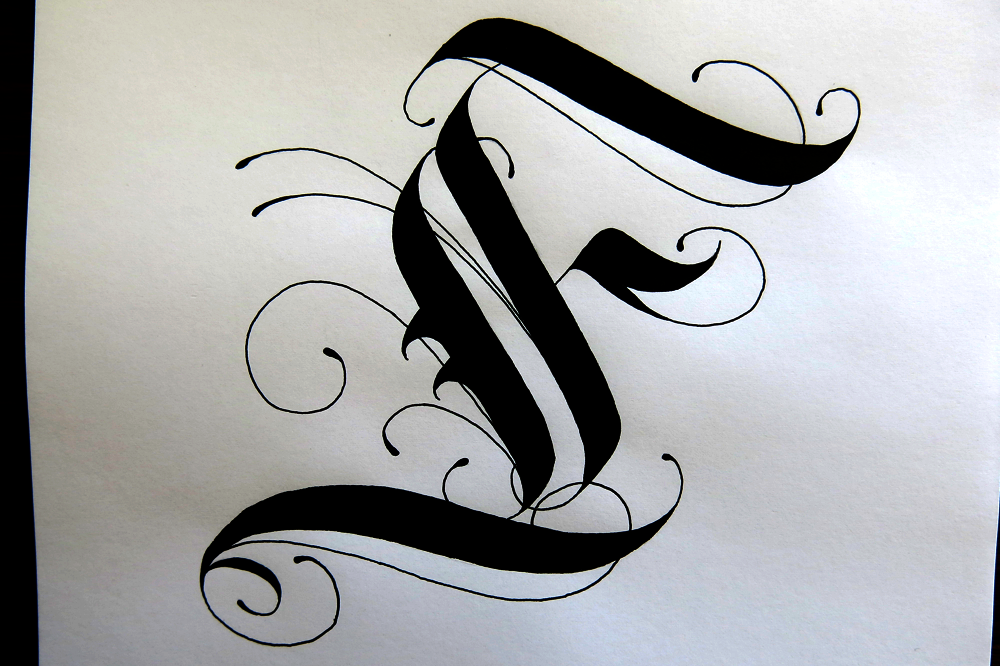
Beauty in Truth: some experimentation with flourishing and ornamentation in a Copperplate style. I also incorporated the style of B I used in my Drop Cap a Day Inktober project.

Trust

Trust: a Gothic piece, drawing inspiration from several scripts that I’m sure have names, but I can’t remember right now. Though Gothic scripts are pretty straight forward, and easy to sketch in pencil especially, I’m still finding plenty to learn with each piece.

Alive

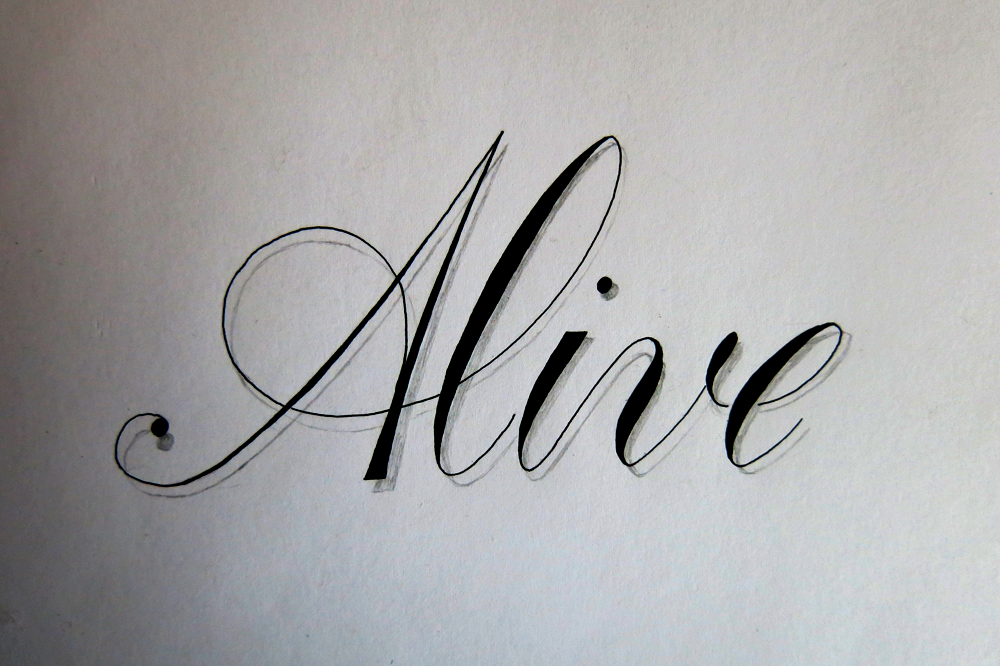
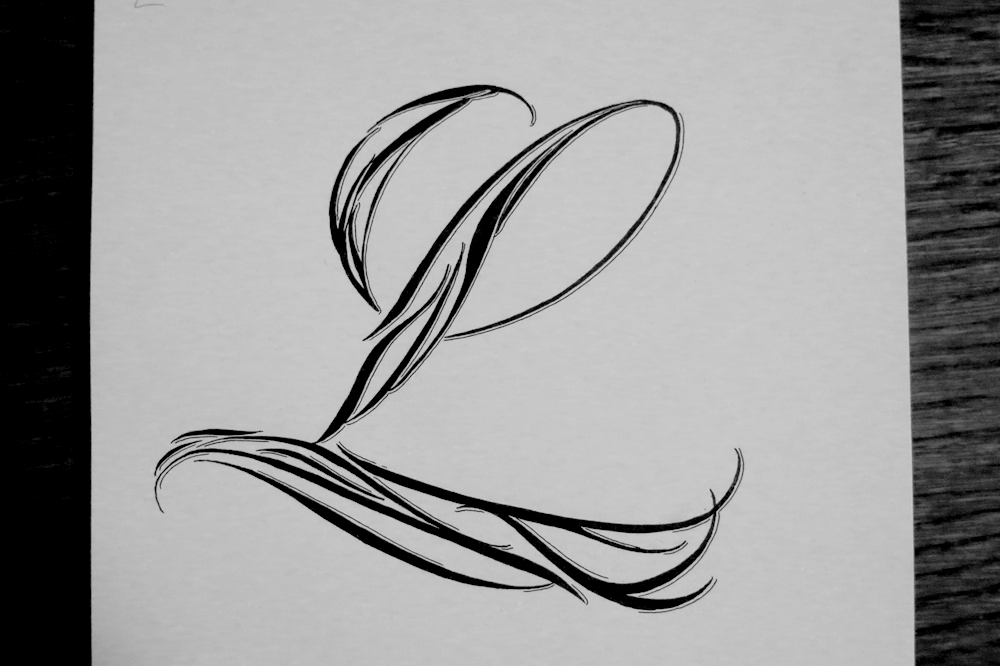
Alive: some more simple Copperplate calligraphy style letters here. I used ink and pencil on this piece to give it a little drop shadow to make it pop. The effect works quite well, and makes me consider investing in some grey inks to get a more reliable and lasting medium that gives the same feel.

Earth

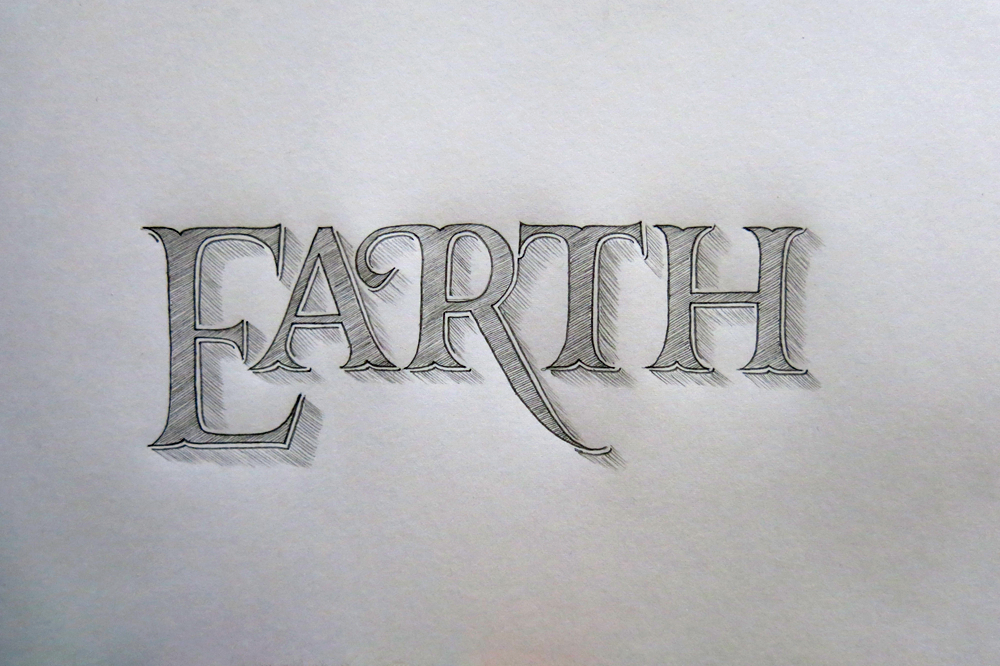
Earth: similar to the Air piece in style and ornamentation. I think it should be a letterer’s mantra that you can never know too much about Roman capitals. And if you do, please start teaching others.

Be Your Own Hero

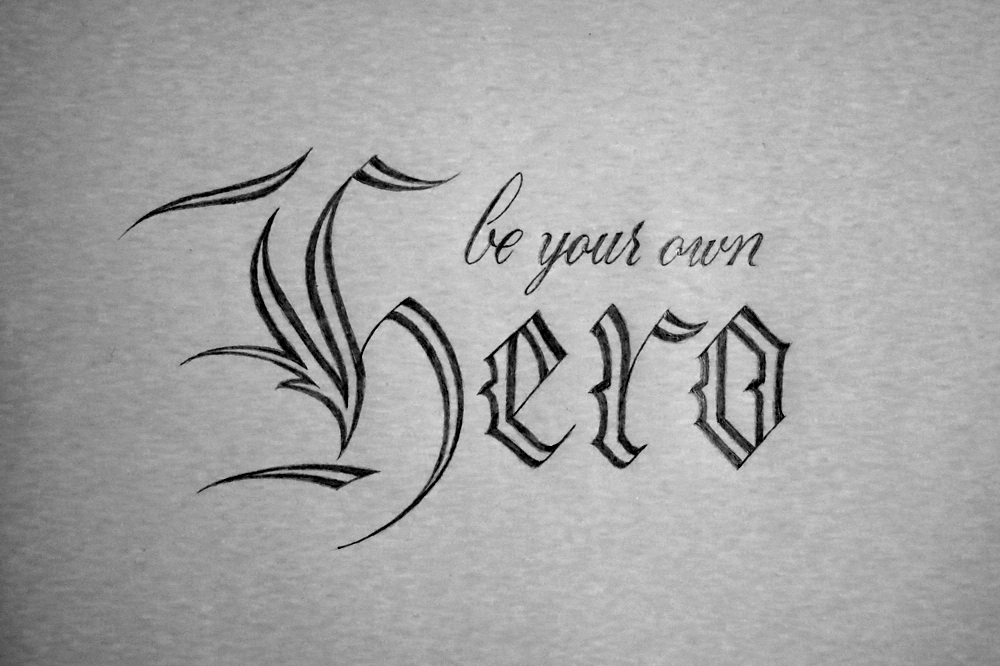
Be your own hero: combining two styles here – Copperplate and Gothic. The composition came out as I wanted, but I can’t help but feel it would be nice if the words had allowed for a letter with an ascender at the end of the last word so that the Copperplate would be nested between the Gothic on each side.

Better Together

Better Together: sometimes simple & elegant is all you need, and what better way to achieve it than a Copperplate-style script piece? It’s my wife’s birthday today, so I made her this little sketch to show her my appreciation, and took the time to doodle out some flourishes while I was at it.

Some of these pieces might pop up again later, or elements from them, at least, in later posts. I’m thinking of making a piece around the Earth/Air/Water/Fire “elements” after having watched a TV show called Avatar, so the other two will probably be along at some point, but they may be in a different style as I explore ideas for the piece. As always, if you’re interested in staying up to date with these daily doodles as they come, follow me on Instagram.

Inktober Drop Caps (Part 1)

I recently discovered something called Inktober, which is a challenge to artists to produce one piece of work in ink each day of October. Of course, I already work exclusively in ink, so it suits me well in that regard. The daily part, however, is something I haven’t done since my Thing A Day project, which is very close to being one year ago. Back then, I had only just started lettering, and looking back on the posts, I can see so much I would change and so much that I have learnt. So nearly a year later, I find that I’m back to doing a thing a day, though this time I decided to do an exploration of styles in designing drop caps. Similar to my Days of the Week project, I took this opportunity to challenge myself to making each drop cap as different from the others as possible.

At the same time, I’ve been posting each drop cap as it comes to Twitter and having a little fun composing each tweet to start with the same letter as each day’s drop cap.

Here, I will provide a little insight into what I was aiming for with each drop cap and how it turned out.

Dropcap A

A: My goal was what is essentially a Roman capital with a healthy dose of Gothic inspiration informing it. As much as I love Gothic alphabets, the letter A always seems lacking somehow, so it was fun to inject a little of the style into something a bit more aesthetically pleasing and legible.

Dropcap B

B: I looked to create a letter B that fit well with a Copperplate calligraphy style, but had a unique formation. If you follow the stroke of the pen from the curl at the top right (which would be the starting place in writing it) and trace it all the way through the letter you can see that the lower bowl of the B is created before the upper, which is not the normal way round. To complement the odd formation, the decoration is a little Escher-esque.

Dropcap C

C: Going for a kind of 3D style, which is pretty common in lettering, but the tendency seems to be to use either a shadow or a side-on view of a raised letter. If the two are combined (which they sometimes are) then it seems that the shadow is always comes on the same side as the raised effect. In this case, I experimented with making the light source come from (roughly) the same position as the perspective.

Dropcap D

D: A straight up experiment in making things unabashedly swirly. I think that there is a lot more to explore with this style, and I revisit it with the L, later. I think I might experiment further with it in future lettering pieces, too.

Dropcap E

E: This is another example of a raised letter, like the C, but with no shadow. Instead, I endeavoured to make what looks like an inlay made of wood. If it’s hard to see in the small preview, click on the image to get a better look!

Dropcap F

F: The first really Gothic letter I did in the Inktober challenge. The A was an something I wanted to create in a space between traditional styles, but this time, I was aiming for something as more of a calligraffiti-Gothic hybrid.

Dropcap G

G: Sunday is my day off, so I had more time to add more detail and have fun. I was aiming for something ornate and fun, while still adhering to good fundamentals of Roman letter design. It’s important to spend a long time thinking about proportions and form before getting too bogged down in the details.

Dropcap H

H: Bold and strong, inspired by Art Deco power and seeming fascination with trains and forward motion. I used stippling for the first time in what seems like forever to create the effect in the middle.

Dropcap I

I: Similar to the F, this one draws most of its elements from Gothic styles of calligraphy, but its form adheres a little bit more to what we would consider a traditional hand-written capital letter I crossed on the two ends. I think that the little drop shadow outline gives it a nicer effect than what I was going for on the F, so I was pleased with how it turned out.

Dropcap J

J: A bit of an unconventional form with is a combination of a typographic J, which often omits the full curl on the end of the stem, and a hand-written style with a full crossbar on top. The ornamentation is something that I enjoyed doing on a previous lettering piece and wanted to dedicate some time to in one of my drop caps. I did take a lot longer than other letters though!

Dropcap K

K: This one is in a pretty comic-book-like style, which is something that I haven’t explored much before. The form of the letter, the strong drop shadow, and the interior shading come together to make the style, and it ends up standing out as quite different from the other drop caps.

Dropcap L

L: Having enjoyed the D, I decided to create a letter that was made entirely of swirly bits. Before filling in the outline it looked almost as though it was made of feathers, and it does a little still, I suppose.

Dropcap M

M: This one combines quite a few things I’ve done in past lettering pieces. The decoration on the inlay, the fragmented style and the raised sides are all elements I’ve used before, but not quite in this combination, where they end up creating a unique effect.

The rest of the alphabet will be along in a a couple of weeks or so after I’ve finished the Inktober challenge. In fact, I started a couple of days before Inktober, having decided on a whim to do a drop cap a day, so I will run out of letters a few days before the end of October. I’m planning on doing some number-based lettering pieces, or at the very least some ever popular ampersand practice, and other symbols. Why do designers love ampersands so much anyway? What about the poor @ sign, which never gets much love?

Thing a Day (Day 7)

It’s here. Day 7. I feel like I should have some grand words to write. Some great insight. Instead, I’m sitting here with orange peel on my lap. The good news is that I fixed the computer, so everything should be tip top from now on! The other good news is that I designed AND inked a large piece today, which is more than I had planned, but I thought that finishing the final day with a pencil sketch would be a let down. And the best news is that it’s nearly bed time! I stayed up far too late getting this finished.

Well, anyway, let’s take a look at it.

Fortune favours the bold.

Fortune favours the bold! Or at least, let’s hope it does. And yes, it’s the British spelling of “favour”, what can I say. As for what happened with this piece, I can say that it’s an idea that I had yesterday, and everything was going smoothly until the word “the” became unstuck in time and space and refused to settle back into normality, therefore making it impossible to fit into the design. Fortunately, I had the bright idea of placing it within a ribbon. As you can see, the dots around the edge are to keep it in. Let’s just hope it doesn’t slip out of the end.

Thing a Day. What can I say? It was pretty tough to keep up to my own standards, and it certainly used up vast chunks of time, but I would certainly say that it was worth it. Thing a Day will stop now, and I will upload on a less (but still) frequent basis. It will also give me more time to explore things that are more experimental.

Lastly, I can say that Thing a Day will be back! Sometime in the near future, there will be more things, and more days, and they will go hand in hand.

Thing a Day (Day 1)

Thing a Day (Day 2)

Thing a Day (Day 3)

Thing a Day (Day 4)

Thing a Day (Day 5)

Thing a Day (Day 6)

Thing a Day (Day 6)

Thing a Day! Here it is, my thing for today. Today’s thing started out as the underdog, the discarded idea, the shunned orphan of the lettering world. Fortunately, a kind man came along and lifted him from the slums of his relegation in the back of a notebook and put him into the sketchbook for inking.

Tomorrow is a dream.

I had the idea yesterday, but didn’t see how it could work out well in terms of spacing. I needed to have the word “tomorrow” very tall and thin for the proportions to fit, but it seemed lanky and weird when I first tried some sketches. Feeling discouraged, and for want of anything else to do for today’s thing, I decided to give it a proper sketch out anyway. It was . . . OK.

Here it is in vanilla form.

IMG_1497

It didn’t seem to work all that well to me, so I knew I needed something else. What I ended up trying was something that I initially thought might ruin it, but there’s no point not trying when it’s just the work of a single day. In the end, it seems that the you can never know until you try, and fortune favours the bold.

On another note, you may notice that my header has been upgraded in image quality. I couldn’t stand how terrible it looked, so I borrowed someone else’s computer to upload some photos from my camera. It worked out great! Hooray!

Tomorrow is the last day of Thing a Day, so I’m hoping I’ll be able to come up with a good one! Come and check it out.

Thing a Day (Day 1)

Thing a Day (Day 2)

Thing a Day (Day 3)

Thing a Day (Day 4)

Thing a Day (Day 5)

Thing a Day (Day 7)

Thing a Day (Day 5)

So, today, my new lead holder and leads arrived, meaning I can finally sketch with a sharp pencil again. And the lead pointer really does the trick! Now, all I need is my computer fixed, a large and wealthy customer base, and I’ll be all set for being a professional graphic designer. Well, we’ll see what we can do about the second one.

Anyway, in yesterday’s Thing a Day, I mentioned that my ideas for today’s thing would be to improve the site a little. I’m sure that you will have noticed the change already, as it’s right there at the top of the page! Well, as you can see, it’s a lettered header to replace the old boring one. Unfortunately, iPad attacks! Oh my grainy! Well, we’ll see what we can do once the computer is fixed.

This thing didn’t take much in terms of the concept of it, seeing as it’s just my signature and the word lettering, but the proportions and arranging of the letters was quite tricky.

Take a look from another angle:

Jack Standbridge Lettering

Odd to think that there are only two days left of my Thing a Day challenge. It will certainly free up a lot more time for me to do ILT (Important Life Things), but it’s teaching me a thing or two about giving myself a lot to do, and how to be productive even when not in too creative a mood.

Come back tomorrow for the penultimate Thing a Day!

Thing a Day (Day 1)

Thing a Day (Day 2)

Thing a Day (Day 3)

Thing a Day (Day 4)

Thing a Day (Day 6)

Thing a Day (Day 7)

Thing a Day (Day 4)

Well, I’m past half way through my thing a day week. Over yesterday and today, I was planning and inking one larger piece, the planning being yesterday’s thing and inking being today’s.

I’m quite pleased with how it’s turned out having started from this:image

Today’s thing is a little different from other things. It uses bolder shapes and no serifs. It’s an experiment with an unconventional shape. It is two sentences, and it’s the first piece with no hatching.

And aside from anything else, it looks taller than it is wide, yet it is wider than it is tall. Strange.

What we live becomes normal. Happiness comes from within.

Would you believe that it’s seven inches wide, but only five and a half tall? One of my stumbling blocks in designing it was that I was trying to sketch it out in portrait, when in fact it needed to be landscape.

As for tomorrow’s thing, I have some ideas already. Something to make the site a little more appealing, hopefully. Stay tuned!

Thing a Day (Day 1)

Thing a Day (Day 2)

Thing a Day (Day 3)

Thing a Day (Day 5)

Thing a Day (Day 6)

Thing a Day (Day 7)

Thing a Day (Day 3)

Wow! Day 3 is here and thing 3 is surely around here somewhere too. Yesterday’s thing was more time consuming than I had expected. I thought that it being smaller than other pieces would mean that it would be quicker to finish, but not so!

Stop Hesitating.

That out of the way, let’s think about today. Seeing as yesterday’s thing was so time consuming I decided that I would plan a large piece and not ink it for today’s thing. Image quality is definitely suffering, however, so please forgive the iPad’s inferior lens capabilities.

The subject matter for today’s lettering is reflective of my mood, I suppose. My computer screen being smashed is the kind of thing that would usually get me down, but I’m taking an optimistic approach, which is made easier as I am having so much fun lettering! Take a look:

image

Thing a Day (Day 1)

Thing a Day (Day 2)

Thing a Day (Day 4)

Thing a Day (Day 5)

Thing a Day (Day 6)

Thing a Day (Day 7)

Thing a Day (Day 2)

Whew, what a day. Broke the computer, burnt my finger, and ran out of pencil lead! However, first things first: yesterday’s completed thing!

IMG_1777


Setbacks aside, I’m on my way to having thing 2 finished. Seeing as the computer is out of action, I’m having to post from the iPad, so photos aren’t going to be so great. (Updated now!)

Today’s thing is a small design, meaning I’m aiming to have it done completely by the end of today. That’ll make two complete things in two days! How novel. Anyway, here’s proof of my homework. Let’s just hope the dog doesn’t eat it and make things worse…

image

It’ll be a few days (or weeks!) before my computer is back up, so site updates might be slow in general, but Thing a Day will be a priority. It might be hard, but if I take my own advice, everything will work out. Stop Hesitating!

Thing a Day (Day 1)

Thing a Day (Day 3)

Thing a Day (Day 4)

Thing a Day (Day 5)

Thing a Day (Day 6)

Thing a Day (Day 7)

Thing a Day (Day 1)

So in the spirit of productivity, I’m going to try something one of my favourite musicians and comedians, Jonathan Coulton did. He set himself a challenge to produce 52 things in a year, at a rate of one a week. By things he did not mean full songs, though he did come out with some. He didn’t limit himself to making anything fantastic or polished. He just set himself to making a “thing”. Whether that “thing” was an epic story song or a piece of experimental music depended on what inspiration he managed to find in that week.

My challenge to myself will be shorter, spanning just one week (starting today). Each day I will either plan out a large design (see You will never wait longer for what I mean by large,) ink a large design, or plan and ink a small design.

Well, you say, today is the first day of the challenge, so where is the result? My answer to that is that I’m inking a large design that I planned out yesterday. Here’s my proof!

IMG_1499

As you can tell, my poor old camera doesn’t live up to modern standards, and I certainly need to get a different bulb for my desk lamp (look at those lines it throws!) but the design is well on its way to being completed. My deadline is midnight tonight, so I have another 4 hours to whip it into shape. The finished article will be uploaded by tomorrow, or I’ll have broken my own promise on the first day! And that won’t do.

Thing a Day (Day 2)

Thing a Day (Day 3)

Thing a Day (Day 4)

Thing a Day (Day 5)

Thing a Day (Day 6)

Thing a Day (Day 7)