Jack Standbridge

Hand Lettering

Menu

Skip to content
  • Home
  • Lettering
  • Blog
  • Logos

Tag Archives: Logo

On Refining Pieces (Feeling Good)

Posted on October 5, 2015 by jackstandbridge

So in the process of lettering, producing pieces isn’t the only thing to do. Sometimes it’s necessary to revisit older pieces, or just work on them over an extended period of time. This week, I wanted to share with you an example of a piece that I have taken a little further than the old ink-on-the-page stage. The Feeling Good ambigram I produced several weeks ago was a hit on Instagram, getting featured by several popular typography curation accounts, and it was something that I wanted to develop a little bit more by taking it into a digital setting.

Feeling Good Vector

Here you can see the result of the vectorisation process, which is a stage that is used to iron out all of the little inconsistencies that occur when producing something by hand. Of course, some letterers make these inconsistencies part of their style, and see it as the appeal of hand lettering, and while that can work for some, and certainly fills a particular niche in the design world, my style is one that focuses on precision and high quality, robust letterforms that will function well at all sizes, display a high level of consistency across the board and survive the test of time.

The great thing about taking an ambigram into a digital setting is that once you have refined the letterforms on one half of it, it’s simply a matter of flipping the design to create the other half, ensuring absolute consistency across the design. This piece was always almost mathematical in its approach, even when it was still just ink on paper. The exact curves of the G/D combination in the ambigram are taken from the perfect circle and oval of the O’s between them. The ovals in the Copperplate letterforms are all informed by the same geometric shape, which has been refined in this digital version of the piece, conforming precisely to an exact standard.

Here’s a little look into what happens under the surface, where you can see what goes on with the manipulation of Bezier handles:

Vector Process

Going forward, my goal is to steadily accumulate more of my pieces in digital versions that will be ready for production as letterpress prints, posters, or t-shirts, depending on what seems most appropriate for each piece. If you’re interested in owning a copy of this piece, then the chances are that you may see it become available in the future. Then you, too, can feel good, no matter which way up you are!

Illusion

Posted on September 1, 2015 by jackstandbridge

Time to count the legs on the elephant!

What am I talking about? Take a look at this piece and follow the letters from top to bottom:

Illusion

You may have found it a little tricky to get a good idea of which bit is part of each letter, and that’s because this piece makes use of a technique found in an old optical illusion involving an elephant that either does or doesn’t have too many legs. Talk about Schrödinger’s elephant!

In the elephant illusion, the fun part is trying to see how many legs and feet the elephant has. It looks like it has 5 feet, but only 4 legs, and that’s because it uses the negative space between the legs to create an extra leg. Similarly, with this lettering piece, it’s the negative space between the tops of the letters that goes on to form the bottoms of the letters. The effect is not to create any kind of “extra leg” illusion, but simply to give the eye a little bit of a confusing time while trying to read the word.

Illusion Design Sketch

Above, you can see the design going from initial sketch to being pencilled in at full size. The curious stipulation about this type of illusion is that it is necessary for the negative space between the letters, that is the inter-letter and intra-letter space both, to be of equal to the width of the strokes of the letters. If there were too much space between one letter and the next, the design would fail, as it would force the corresponding upper or lower section of the letter to become too wide. As a little bonus, there’s the word “letterforms” upside-down at the top.

Here’s the design in a minimalist stage midway through the inking process:

Illusion Progress

Another quirk of this style is that not every word can be done in this way. The way that the letters are split in half means that they need an even number of elements on the top and on the bottom. All these letters have either a single stem that runs from the top of the x-height down to the base line, or they have two. The S is a little strange, in that it only has one stem but takes up more room than other single stem letters, such as the I’s and L’s, but with a little jiggery-pokery, we can make it work. Other letters, however, are not so fortunate as to be able to be included in a design such as this. Consider an upper case letter L. To create this effect, the bottom half of all the letters is simply shifted across one stem’s thickness so that it lines up with the negative space. The upper case L, however, has a single stem, but has a double wide base. As such, there is a gap created at the top that would leave the line of another letter shooting off into space with nothing to join onto. Other letters are simply too complex to maintain legibility when distorting their form so much: the letter K, for instance, with its combination of verticals and opposing diagonals wouldn’t do well in a design such as this.

Symmetry

Posted on July 13, 2015 by jackstandbridge

Last week, I posted an ambigram, and several weeks ago, I posted this ambigram. So what’s the deal? This week sees another ambigram, but in fact, it’s the same as an old one! Well, I’m revisiting this ambigram. I wanted to come back to it and give it a little bit of a make over and dedicate some more time to its development. Looking back at the original ambigram, I feel that it served its purpose, but that there was more potential in the design.

Symmetry Blue

So I took this idea back to stage one, which consists of two parallel lines drawn across the paper for the baseline and x-height, and started to redesign it. My main focus was to have more stylistic consistency across the letters, but also to change the style slightly to something that better reflects the meaning of the word. To start with, all the strokes are split into two pieces, and you’ll notice that many of them are mirror images of each other. Take the two strokes that make up part of the M in the centre, for instance (the ones that the crossbar of the T comes to point at,) and you’ll see that if you rotated them 180 degrees, they would form the same shape. This was the fundamental stroke that I designed first, and upon which all the other strokes are modelled. Of course, plenty of tweaking had to take place for each individual case, but starting with a solid stroke form is important.

The style itself is something that leans slightly more towards Gothic than Italic, but is certainly a rounded Gothic with plenty of Italic influence thrown in to arrive at something caught midway between the two. The E, for instance, only works because of its Gothic influence, and the T is far from what you would see in a traditional Italic hand, yet the S and the M’s take more from Italic than they do Gothic, with the Y’s and R being something of both.

Symmetry Pencil

My plan, eventually, is perhaps to use this piece in another design. Up until this point, I haven’t done any merchandising of my work, but I can’t help but think that a piece like this would do well on something like a T-shirt or coaster, though perhaps framed differently than how it was in the original Tyger! Tyger! piece, or than how it is on its own here. As ever, finding the perfect way to display an ambigram is a puzzle, but in the end I think that I will find the perfect solution to this piece. I will find the piece that was meant to surround it, complement its letter forms and highlight its symmetry. Until then, however, I will have to amuse myself with experimenting with gouache paint as in the first image, which it seems is a wonder to apply with traditional pointed pen calligraphy tools.

Leave a comment

Feeling Good (and how to make an ambigram)

Posted on July 6, 2015 by jackstandbridge

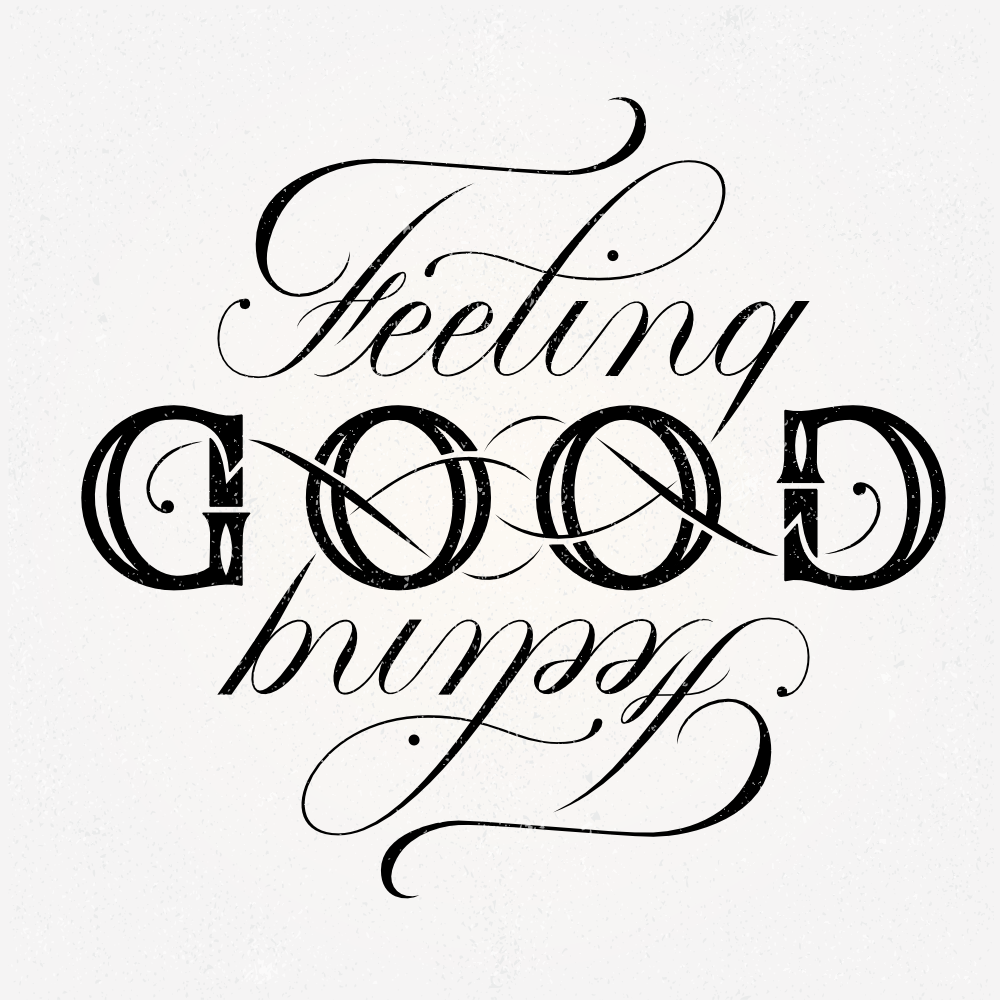
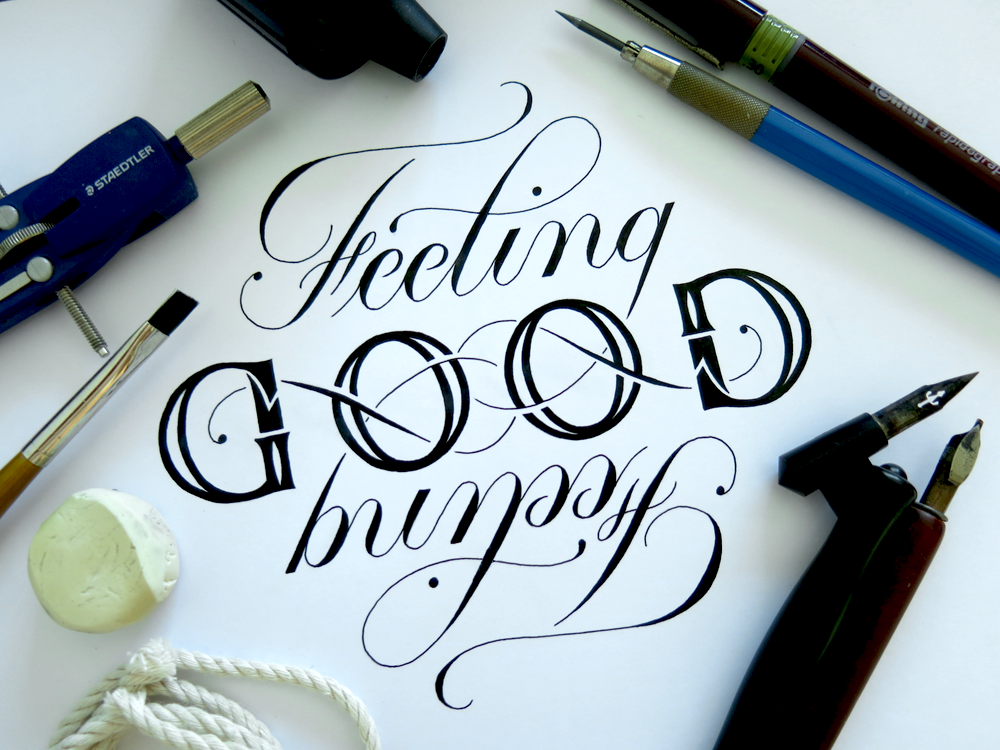
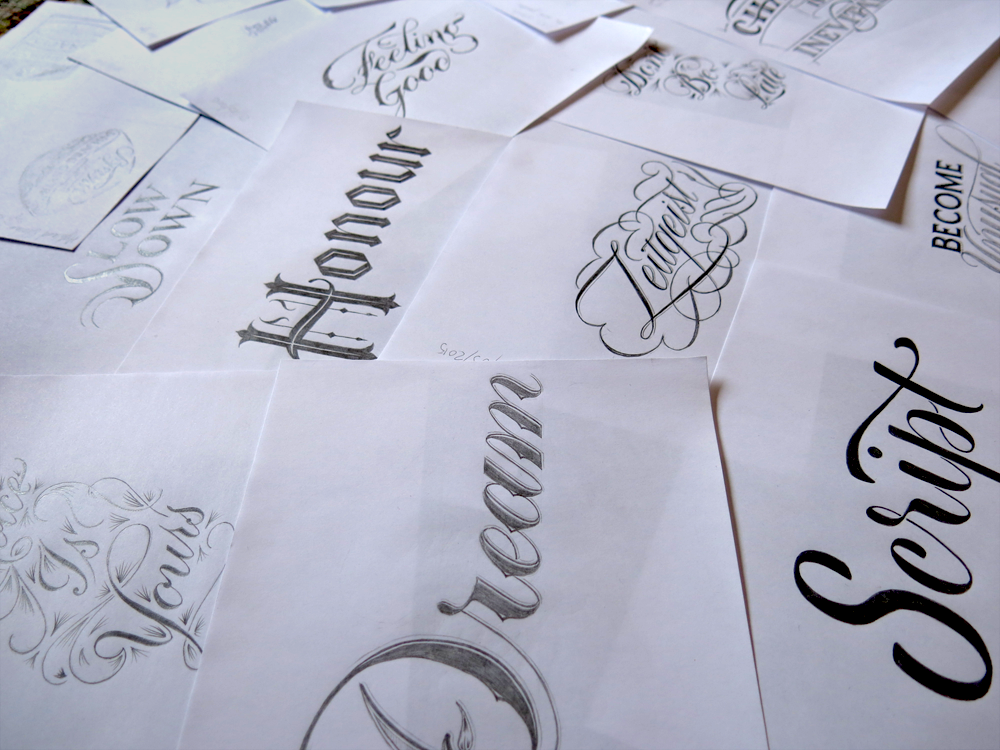
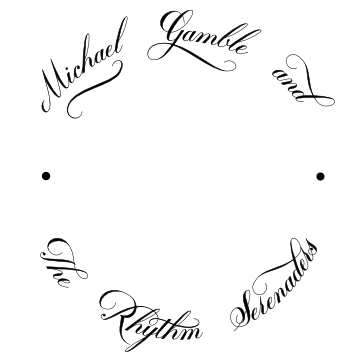
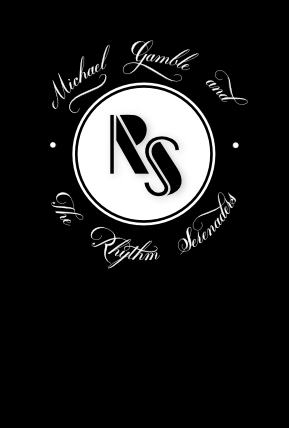
It’s been a while since I’ve done an ambigram, but I was feeling good about this one, so I thought I’d give it a go!

Feeling Good

Aside from the ambigram in the middle, this piece was a good excuse for me to continue with studying Copperplate styles, which is something I returned to last week. Copperplate is almost geometrically precise. The shape of the oval informs just about every letter of the script, and dictates the spacing of the letters too. An interesting thing you can do is to cover the upper part of any Copperplate word and see a funny little row of loops left, which form the lower halves of the letters. In the word “Feeling”, the loops on the underside of the E’s, L and I all form a row, and a little later, the second half of the N and the G, too. A curious side effect of this geometrical construction is that when it’s upside down, it almost looks like a word. It’s strange to try to figure out what the upside down “Feeling” should say. It almost starts with a B (though a true Copperplate B looks different to this), and is followed convincingly by a passable U. It’s from there that you have to do some typographical gymnastics to convince yourself of a possible N made from the I and L, or perhaps a P from the L and E. Either way, the good news is that this piece reads the same both ways up! I encourage you to do a handstand to see for yourself.

Once, long ago, I had a section about ambigrams on this website, which explained in very brief words a little about ambigrams. Since then I’ve done some thinking about the process, and I’d like to expound upon it a bit more:

Imagine trying to make ambigrams is like walking into a room with a million puzzles. All you know is that some of the puzzles can’t be solved and some can, but you have no idea what proportion is solvable or how hard they will be to solve. So you can just pick up some puzzles and try to solve them. Some of them seem like you can get somewhere, but then get completely stuck, and so remain only partially solved, and others look like they won’t work, but you find a surprising solution.

Chances are that you, as the person put into this room, are not the best puzzle solver in the world, and that someone with more experience solving puzzles could solve the ones you couldn’t and solve them well, too. The problem is that barely anyone has ever tried any of these puzzles, and if they have, you can only ever find out if they succeeded, because they never tell you about the puzzles that they didn’t solve. Because of that, you can never know if a puzzle you failed at could be solved well. Some puzzles are a little more popular than most, and so you can look up solutions that people may have come up with, but in general, that spoils the game, and it’s much better to look up solutions only after you have solved it, or decided to abandon it and never return.

That is what ambigramming is.

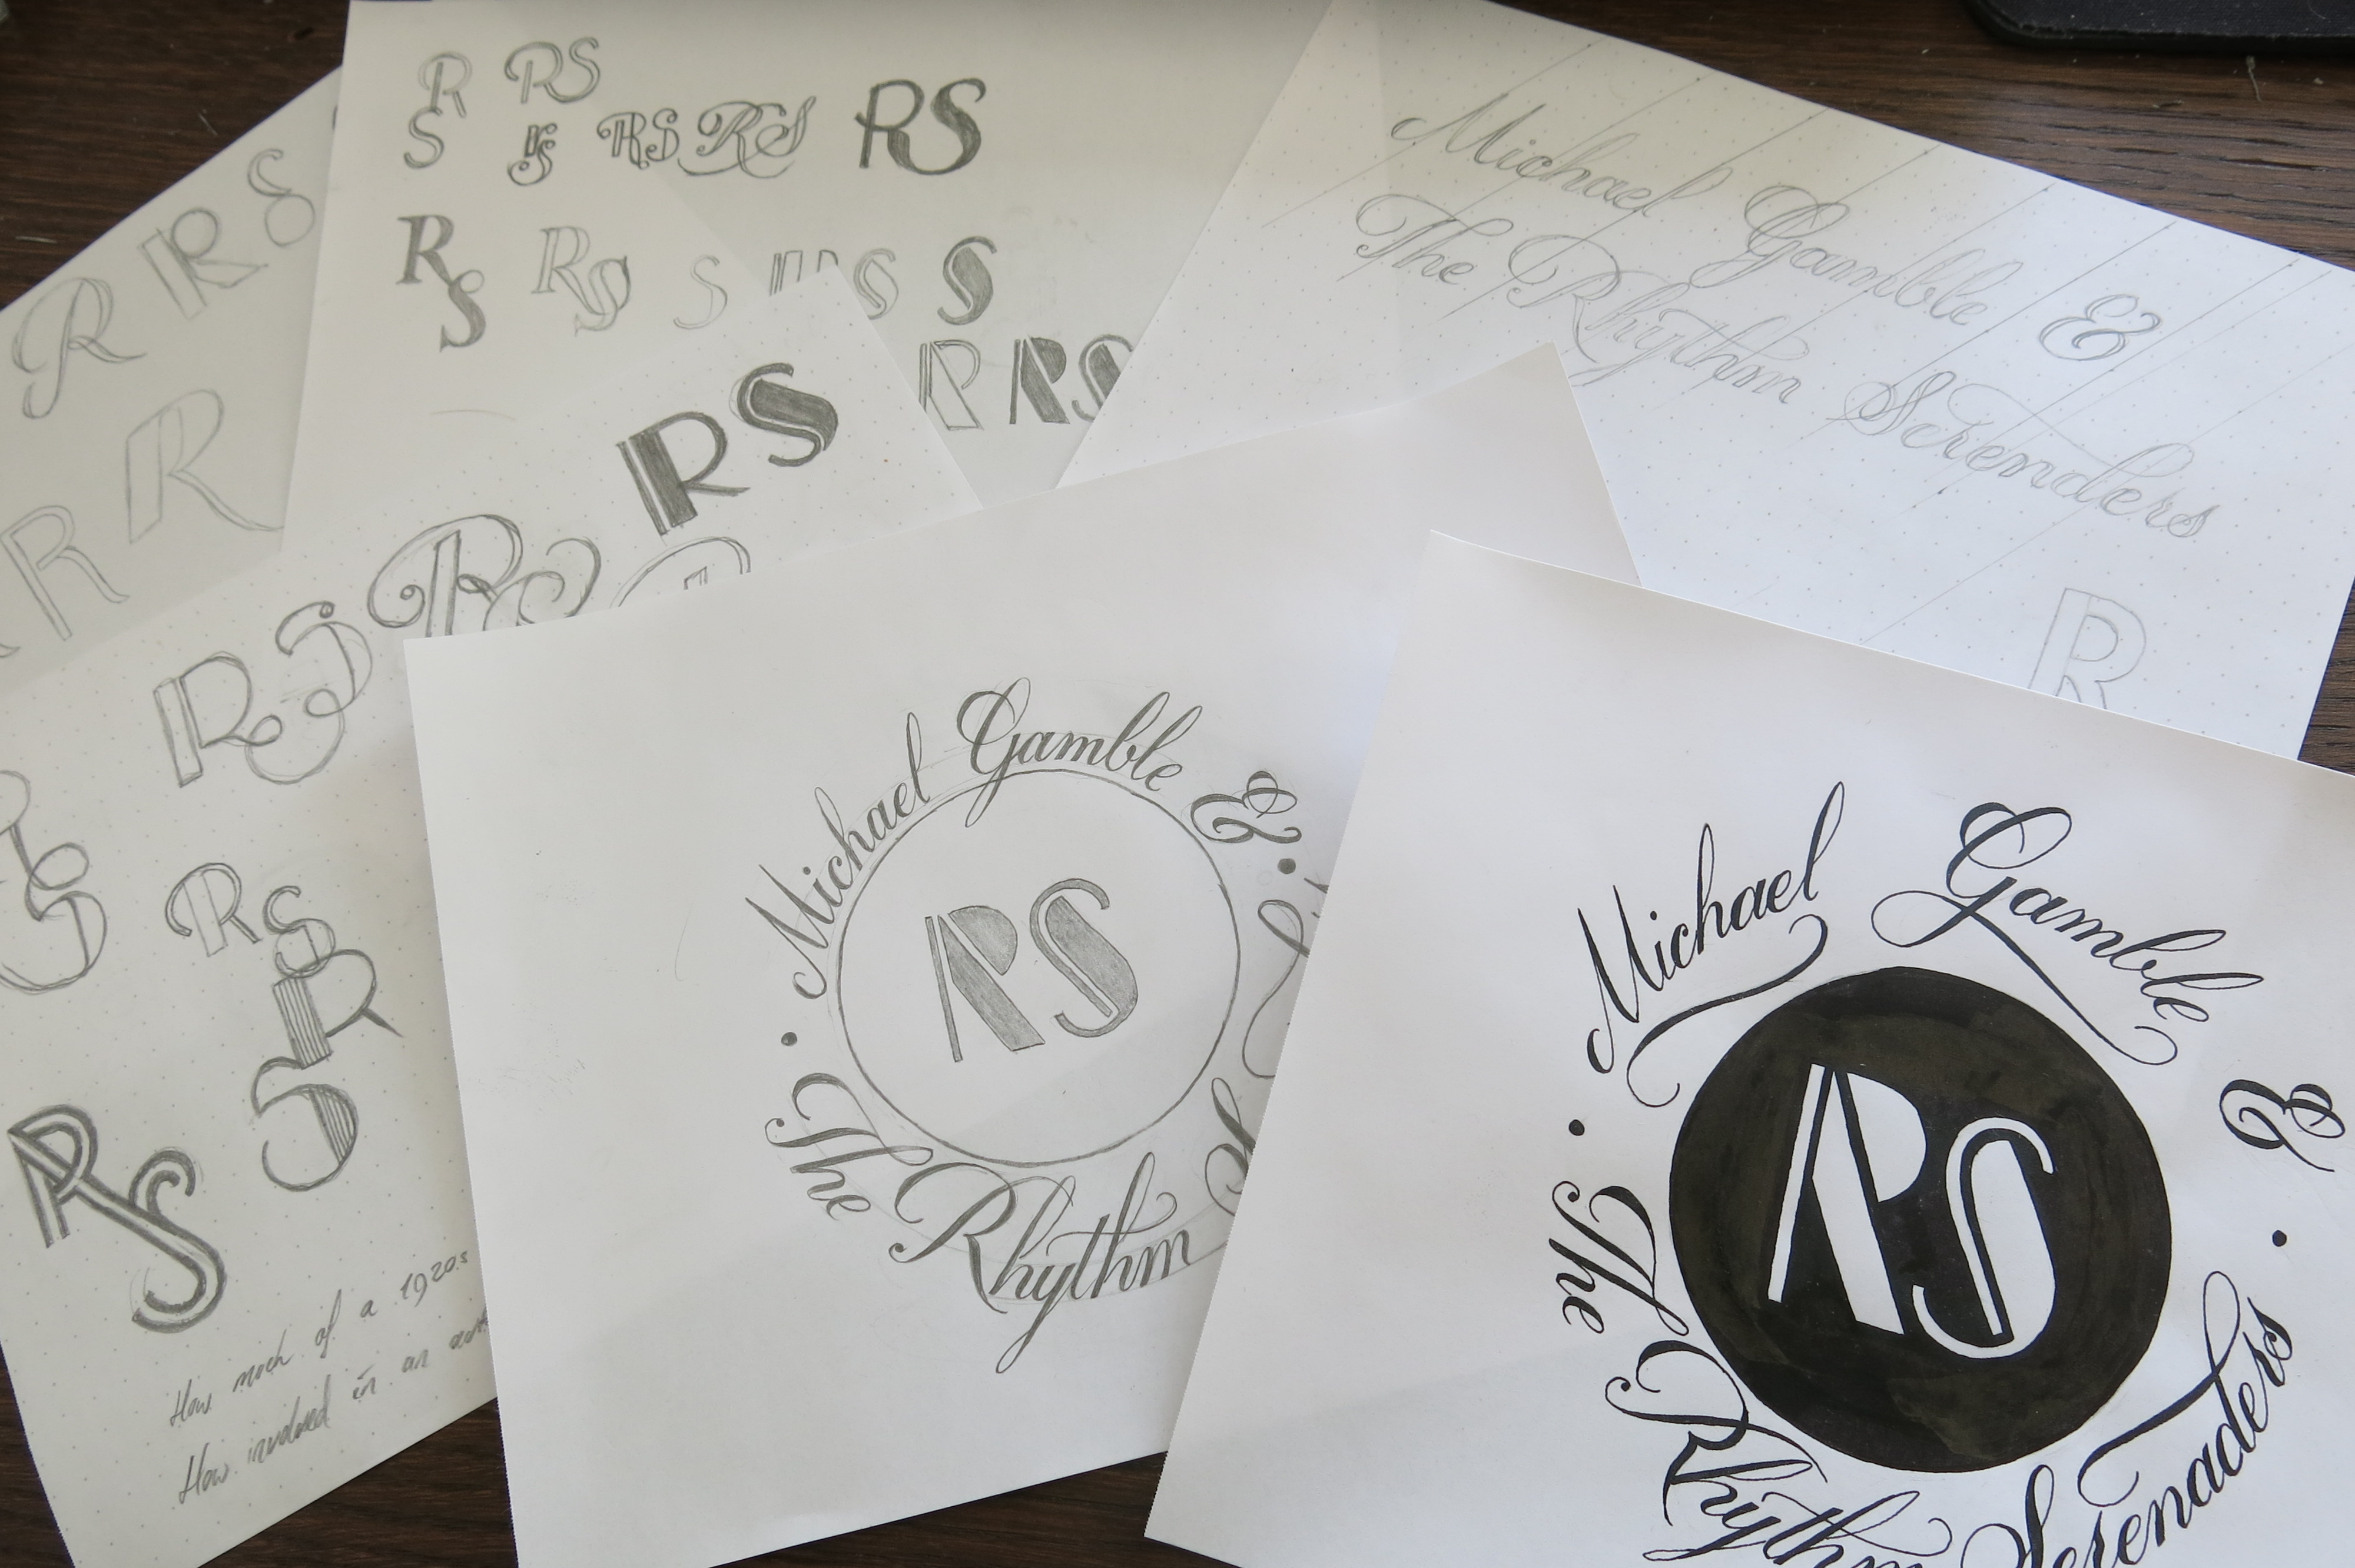
If you’re curious about the actual process that leads to a finished ambigram, though, here it is:

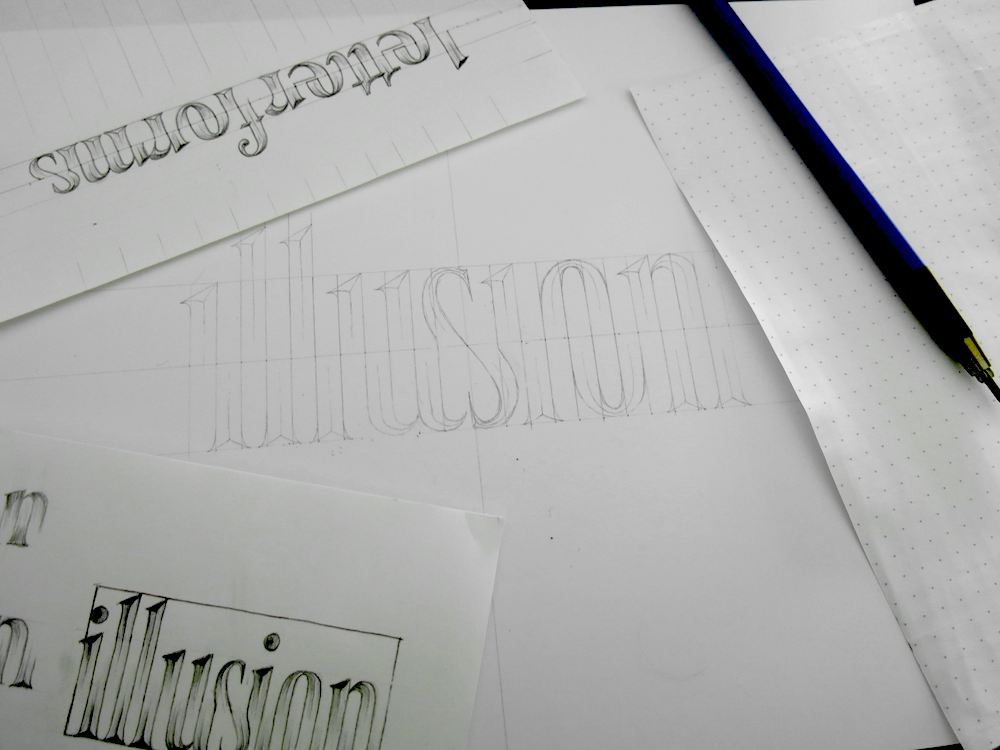
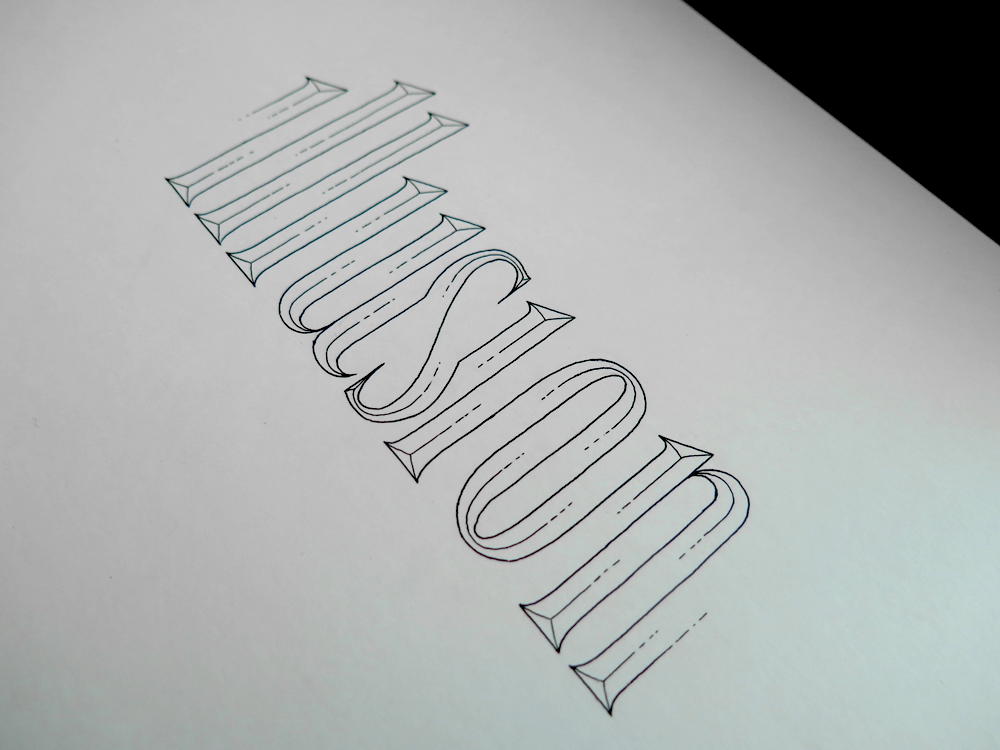
  • Write the word the right way up on a piece of paper.
  • Turn the paper upside-down and write it again underneath the other word. You don’t have to match them letter for letter, though it can help. Some letters are long or short, however, so matching an M with an I doesn’t really work. If you were doing the word “Mill”, you would probably want the M to cover the I, L & L, so don’t get stuck with doing a 1 to 1 configuration.
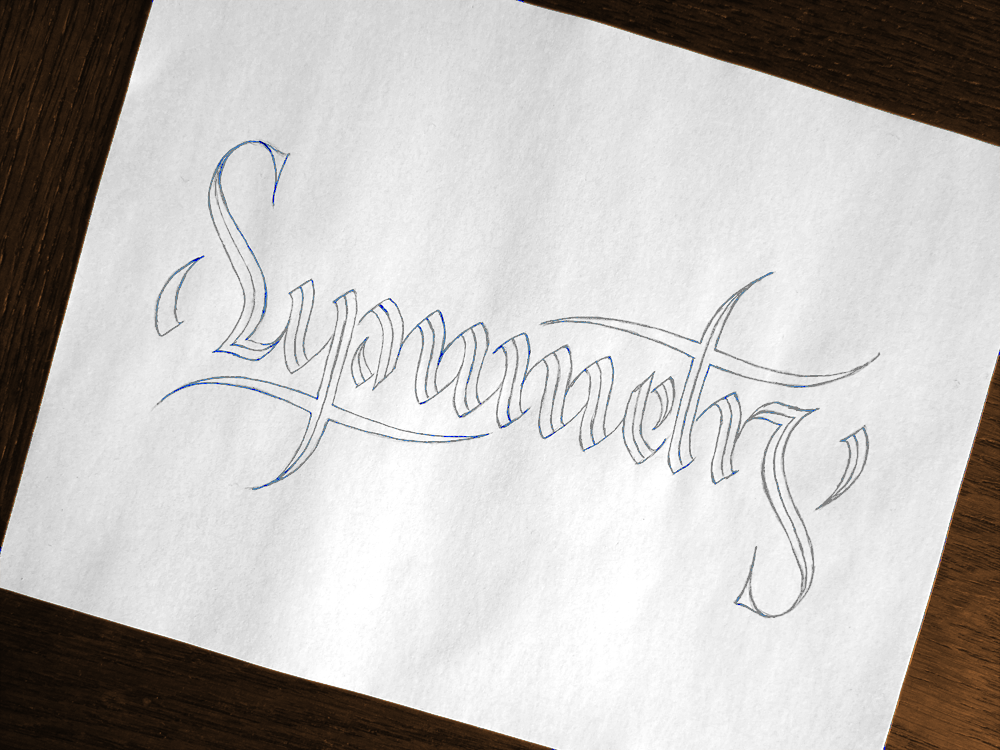
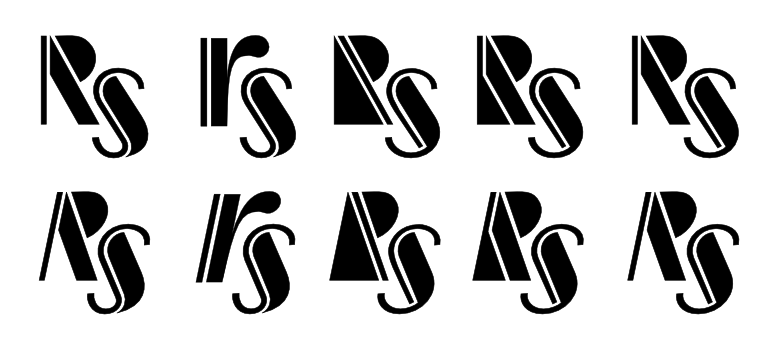
  • Start trying to find ways in which you can change parts of the letters to look like the others without sacrificing their defining features. This is the hard part, and often seems impossible. Different letters tend to work better or worse with different styles. One letter combination may work very well in a Blackletter style, but not at all in a Copperplate style, or typographical style. Similarly, they can work in uppercase, but not lowercase, and vice versa. Sadly, sometimes, a whole word can work, but needs to have a mix of styles to do so, and so looks ugly and needs to be abandoned.
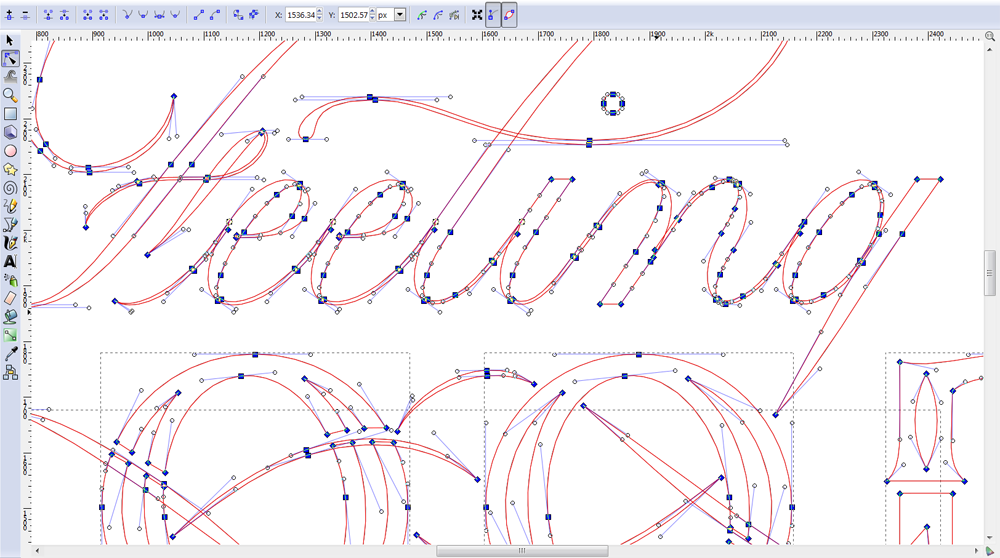
  • Once you are lucky enough to find a solution to each letter pair/group, sketch it out several more times and refine it for legibility. At this stage, still, you may need to discard your ambigram, because it doesn’t ever look clean or legible.

There is one big trick that you can use, which took me a while to figure out, and it relies on a peculiar way that the human brain works. Test it out yourself: Take a line of text. Any line from my comment, or any text you have lying around will work. Take a piece of paper and cover up the bottom half of all the letters. The sentence should still be readable, depending on the exact letters used. Now try the other way, and cover the top half, leaving the bottom half exposed. It should be a bit harder to read. A well designed typeface should leave you still capable of reading what is there even with the top covered. If you were to try it with some Copperplate, however, as we just discovered, all you might see with some words is a row of loops. The bottom half of the letters doesn’t give you much of a clue as to what the word is, but the top helps.

With that knowledge, you can trick the viewer by making the top of the letters conform more to the target word than the bottoms.

Leave a comment

Cranks & Shocks Case Study

Posted on May 18, 2015 by jackstandbridge

Here’s another case study that I did recently. The brief was a bike shop looking to incorporate some stylishness to their brand, and also include an antiquated feel. An establishment looking to up their game and cement their position as a permanent fixture on the map, while catching more eyes with something that gives a more unique feel.

Cranks & Shocks

I started with planning out the symmetry in the text across the middle. Having an ampersand and an S next to each other is convenient in that they share similar elements. After several iterations, and having found something I was pleased with, I started work on the other elements. The monogram in the bottom centre is loosely based on the letters from the main text, but needed some obvious adjustments. The flourishes at the top also lead to a fun design in the middle: a bike made of flourishes. After planning the ribbons, I also worked in some additional flourishes in the negative space below the main text.

Cranks Detail

Each of these elements is suited well to being extracted and used in different places. For example, the monogram is convenient for a logo on a document or as a watermark, while the flourish bicycle functions well as a logo on a letterpress business card or promotional stickers. The main text can be lifted out to form the header on documents, and to suit any other uses such as banners or printed straight on narrow surfaces. The full design fits well on the side of a vehicle and on the window of the business.

Cranks & Shocks Monogram Detail

What it means to learn calligraphy.

Posted on April 27, 2015 by jackstandbridge

What it means to learn calligraphy. If you were looking for something about lettering, I’m afraid it’s not the subject this week. The difference between calligraphy and lettering is mysterious to some, but it is significant. Lettering, as with typography, is a different process entirely, though it can often produce a similar result. The modern letter forms that we use today, the ones you read in books, the ones you see on your computer screens, even the ones you write your shopping lists with can be traced back to calligraphy. Calligraphy is the way that information was stored for centuries, and during those centuries, we have had plenty of time to come up with something better. The funny thing is that despite the time we have had to improve upon the forms, we haven’t.

The fundamental root of calligraphy that we know today can be found in capitalis monumentalis, or Roman square capitals. The most famous example can be found in the Trajan column inscription, created some 2000 years ago, which has been a source of inspiration for scribes since.

So what is the significance? Well, for anyone who really wants to understand letter forms, it’s essential study. To look at the source of letters is to understand their construction. To understand the strokes of the brush, the twists of the nib, the order of execution informs everything we know about letters. Have you ever wondered why there are two types of lower case A? One is a single story letter, similar to a lower case D with the ascender chopped off. The other is a two story letter, which has an arm that curls round over its head. The reason is that these two styles stem from difference sources. The two story letter (which you likely see in this text, depending on your computer’s available typefaces) comes from Roman lower case letters, whereas the other is derived from Italic calligraphy. (Some sad type faces, unfortunately, simply have a poor man’s Italic which is made by twisting the Romans into Italic imitations.)

Knowing all this, a letterer would do themselves a disservice not to study calligraphy. But what does it mean to learn calligraphy? What do you need to understand the strokes, twists and anatomy of calligraphy?

Calligraphy Practice Sheets

Time.

Letter forms that have stood the test of time, that have been available to be changed for centuries yet have stayed the same, that have an undeniable timelessness are simultaneously simple and complex. They are simple in that they convey everything that they need to with utmost legibility. They are complex in that their construction holds such intricacies that seem invisible upon first examination, yet are essential to their successful execution. They are an excellent example of both form and function. With every session of study you can delve a little deeper and discover some of the silent secrets hidden within the works of long dead masters. I recently learnt that having spent over 30 years at the art, one of the calligraphers I admire greatly has returned to studying Romans 6 times, dedicating weeks at a time to the process, and each time teases more subtlety and knowledge from the ancient works.

Is it surprising, then, that it what is truly means to learn calligraphy is time? The time spent studying, the time spent practising, and the time spent contemplating, understanding and progressing.

If you’ve made it this far without much interest in calligraphy, however, and would like some news of lettering, here’s a snapshot of some of the recent daily doodles I do to keep the creative juices flowing:

Daily Doodles

Highland Drachm Whisky Label Case Study.

Posted on April 20, 2015 by jackstandbridge

This week I’ve been working a logo design case study for whisky bottle branding. It’s given me the chance to do some more exploration of the digital side of logo design, as most of the work was put in at the vectorization stage. After some initial pencil sketch designs to get an idea of the right direction for the piece, I quickly transitioned to working with the piece in terms of nodes and Bézier handles.

Highland Drachm

The goal of the piece was to create something through which I could explore some aspects of coloured work that would produce a usable end product. In terms of the lettering on the piece, it’s a blend of rustic, traditional and modern Roman Capitals. The mixture of styles gives an impression of not only modernity but also timelessness and an artisan influence. This piece would be ideal for a smaller company looking to update their branding as part of growing their business and reputation while maintaining the impression of hand craftsmanship and traditional techniques.

Here’s a little preview of the piece as it would appear on the label of a bottle:

Highland Drachm Sample

MJ Monogram

Posted on January 5, 2015 by jackstandbridge

This week, we’re taking a look at a monogram I designed for a friend a little while ago. The brief was for the letters “MJ” to be combined in a way that would make the letters interact with each other in an interesting way while maintaining legibility at a small size. Bonus points were awarded for boldness and simplicity, with a little oddball along the way.

MJ Monogram Large

The idea was to make the J become part of the M and function as its right most leg. After a few iterations, I found that having the J joined to the M made it so that the J was not obviously a different letter, and seemed to just be a curly M. However, having a break between the two letters made it seem that there was a J, and then some other weird letter, perhaps a toppled over A, next to it. To solve the problem, I took out the hairline on the left most leg to make use of the kind of ultra high contrast style typography where nothing but the thicker parts of the letters are visible and the hairlines disappear entirely. In that way, the J can be distinct from the M, but still look like it is part of the same letter.

The second concern was for the piece to work best at two sizes – one being avatar size and the other being favicon size. With the version above, it functioned well as an avatar at 300 x 300 pixels, but once it was scaled down to favicon size, at 32 x 32, and sometimes 16 x 16 pixels, the black outline of the letters became too thin in comparison to the inner red section, and the image ended up a little confusing.

MJ Monogram

This version is 141 x 141 pixels, but scales down well to smaller sizes. Comparing the two versions, it almost seems that they could be the same image, but if the smaller one were to be scaled up to the size of the first, the black outline seems too chunky and thick. Fortunately, the image was only to be used at small sizes, so I was free to make the outline bold to suit the context well. In the name of versatility and future proofing, however, both versions were sent to the client to make sure that the logo could be used in a variety of scaled-up contexts.

Leave a comment

Vertigo

Posted on December 8, 2014 by jackstandbridge

This week, I ran found that I had used the last of my large pad of paper that I usually do inked pieces on, so I turned to doing something digital instead. One of the pieces I did for my daily doodles turned out quite well, and I felt it was worth refining a little. Here’s the sketch I first made for my daily piece, in pencil in an A5 notepad:

Vertigo

From there, I took a few square photos of it (I don’t have a scanner, unfortunately) and then took it into Inkscape to turn it into a digital version. I used the software to iron out all the little bumps and irregularities that you don’t quite notice when you have it on a piece of paper in front of you, but which stand out once it’s displayed on the screen. For instance, in the digital version, the baseline for the smaller letters is a smooth curve, which uses the same line as the top of the letters and the spurs mid way up each letter. After tracing the outline, it’s much quicker to make the little drop shadow by duplicating the whole thing, shifting it slightly, then cutting away everything that lies underneath the original. From then, it’s just a matter of choosing a splash of colour,

Vertigo

As for the other daily doodles this week, they have a mainly calligraphic element to them. The first, “Imagine” is a simple Copperplate inspired doodle I drew a couple of days ago with some flourishes to give it a rounder shape.

Imagine

The second is one I did at the start of the month. It’s a mixture of Copperplate and Gothic styles.

December

The third is some real calligraphy! Surprising, I know, but I do sometimes do other things than lettering with pencils and fine liners. “Strive for more,” done with a Pilot Parallel 3.8mm pen.

Strive for More

Lastly, something that’s coming up next week, for one of my daily pieces I started designing an ornate piece that will be up in ink next Monday once I have gone to buy some more paper.

... Live In ...

Leave a comment

Case Study: RS Monogram Logo design project

Posted on September 22, 2014 by jackstandbridge

A case study of a recent logo design commission for a swing band.

Monogram Inverted Text Circle

Goals

To create a logo in the form of a monogram incorporating an early 1920s aesthetic, and to embody a classy and professional style; at the same time to be simple enough to undergo any scaling necessary and unique enough to be easily recognisable.

To create script lettering to surround the monogram and for the two pieces to function together and independently of each other in white on black and black on white contexts.

IMG_3835

Direction & Style

RS MonogramI started out with exploring as many Art Deco and non Art Deco ideas for the monogram as possible, to discover ways in which the letter forms interact with each other in different styles. From there, I could begin to apply what I had found to create a custom style that satisfied the criteria while remaining unique to the project.

To better steer the project, I researched examples of logotypes, typography and monogram/cypher usage in the 1920s-40s, as well as the principles behind the Art Deco movement. The geometrical influence that guided the movement, particularly in its expression through typography was something I incorporated into the design while still retaining forms that are quickly and easily recognisable in the context of modern typographic principles. A modern audience will perceive the Art Deco aesthetic but will not be distracted by any jarring elements, creating an effective use of the logo while still conveying what was originally intentioned.

Revisions and Refinements

After vectorization, the last part of the process is to make numerous revisions and refinements to both the monogram and the script text to make sure they they are not only the most fitting in terms of style, but also scalability, simplicity and legibility for a contemporary audience. During this process I ensured that the monogram functions well in different contexts including the possibility of use for social media branding.

Monogram Variations

Versatility of the design elements

The two elements of the piece were designed not only to be used independently of each other, but also to be able to interact with each other in a variety of ways. Below are a few examples of how the elements can be used in conjunction with each other in a variety of contexts.

RS Full  RS Circle

CD Case Layout Examples
RS CD 1     RS CD 2     RS CD 3

Uniqueness & Memorability

One of the most important aspects of a monogram for these purposes is a clean and simple design. This piece is designed to be memorable and individual, while still staying true to an authentic aesthetic and classy, clear cut style.

Leave a comment

Post navigation

← Older posts
Blog at WordPress.com.
Jack Standbridge
Blog at WordPress.com.
  • Follow Following
    • Jack Standbridge
    • Join 26 other followers
    • Already have a WordPress.com account? Log in now.
    • Jack Standbridge
    • Customize
    • Follow Following
    • Sign up
    • Log in
    • Report this content
    • View site in Reader
    • Manage subscriptions
    • Collapse this bar
 

Loading Comments...
 

You must be logged in to post a comment.