All Will Come Right

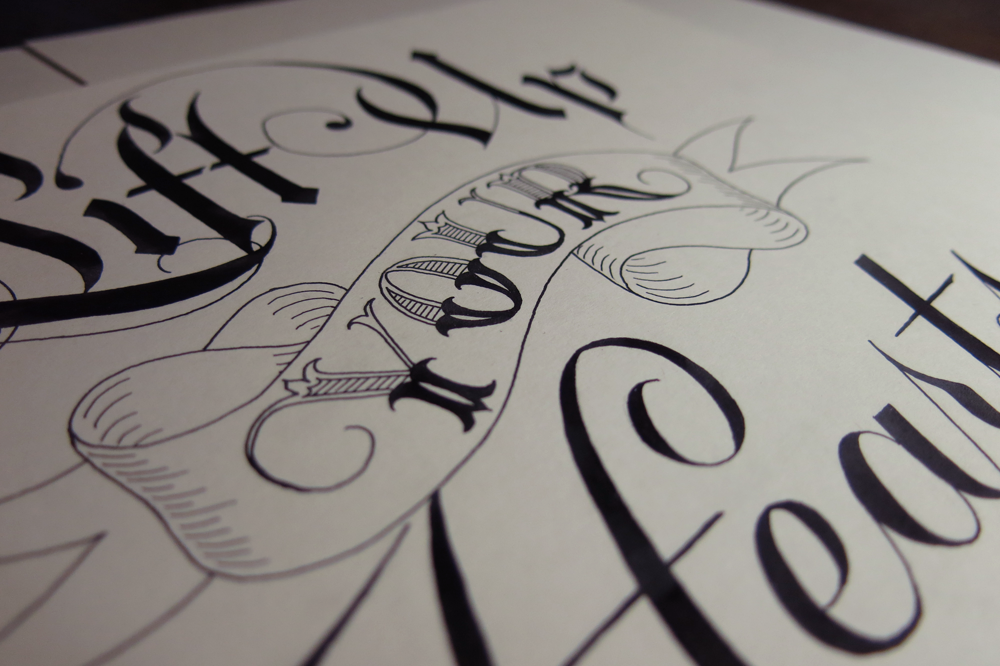
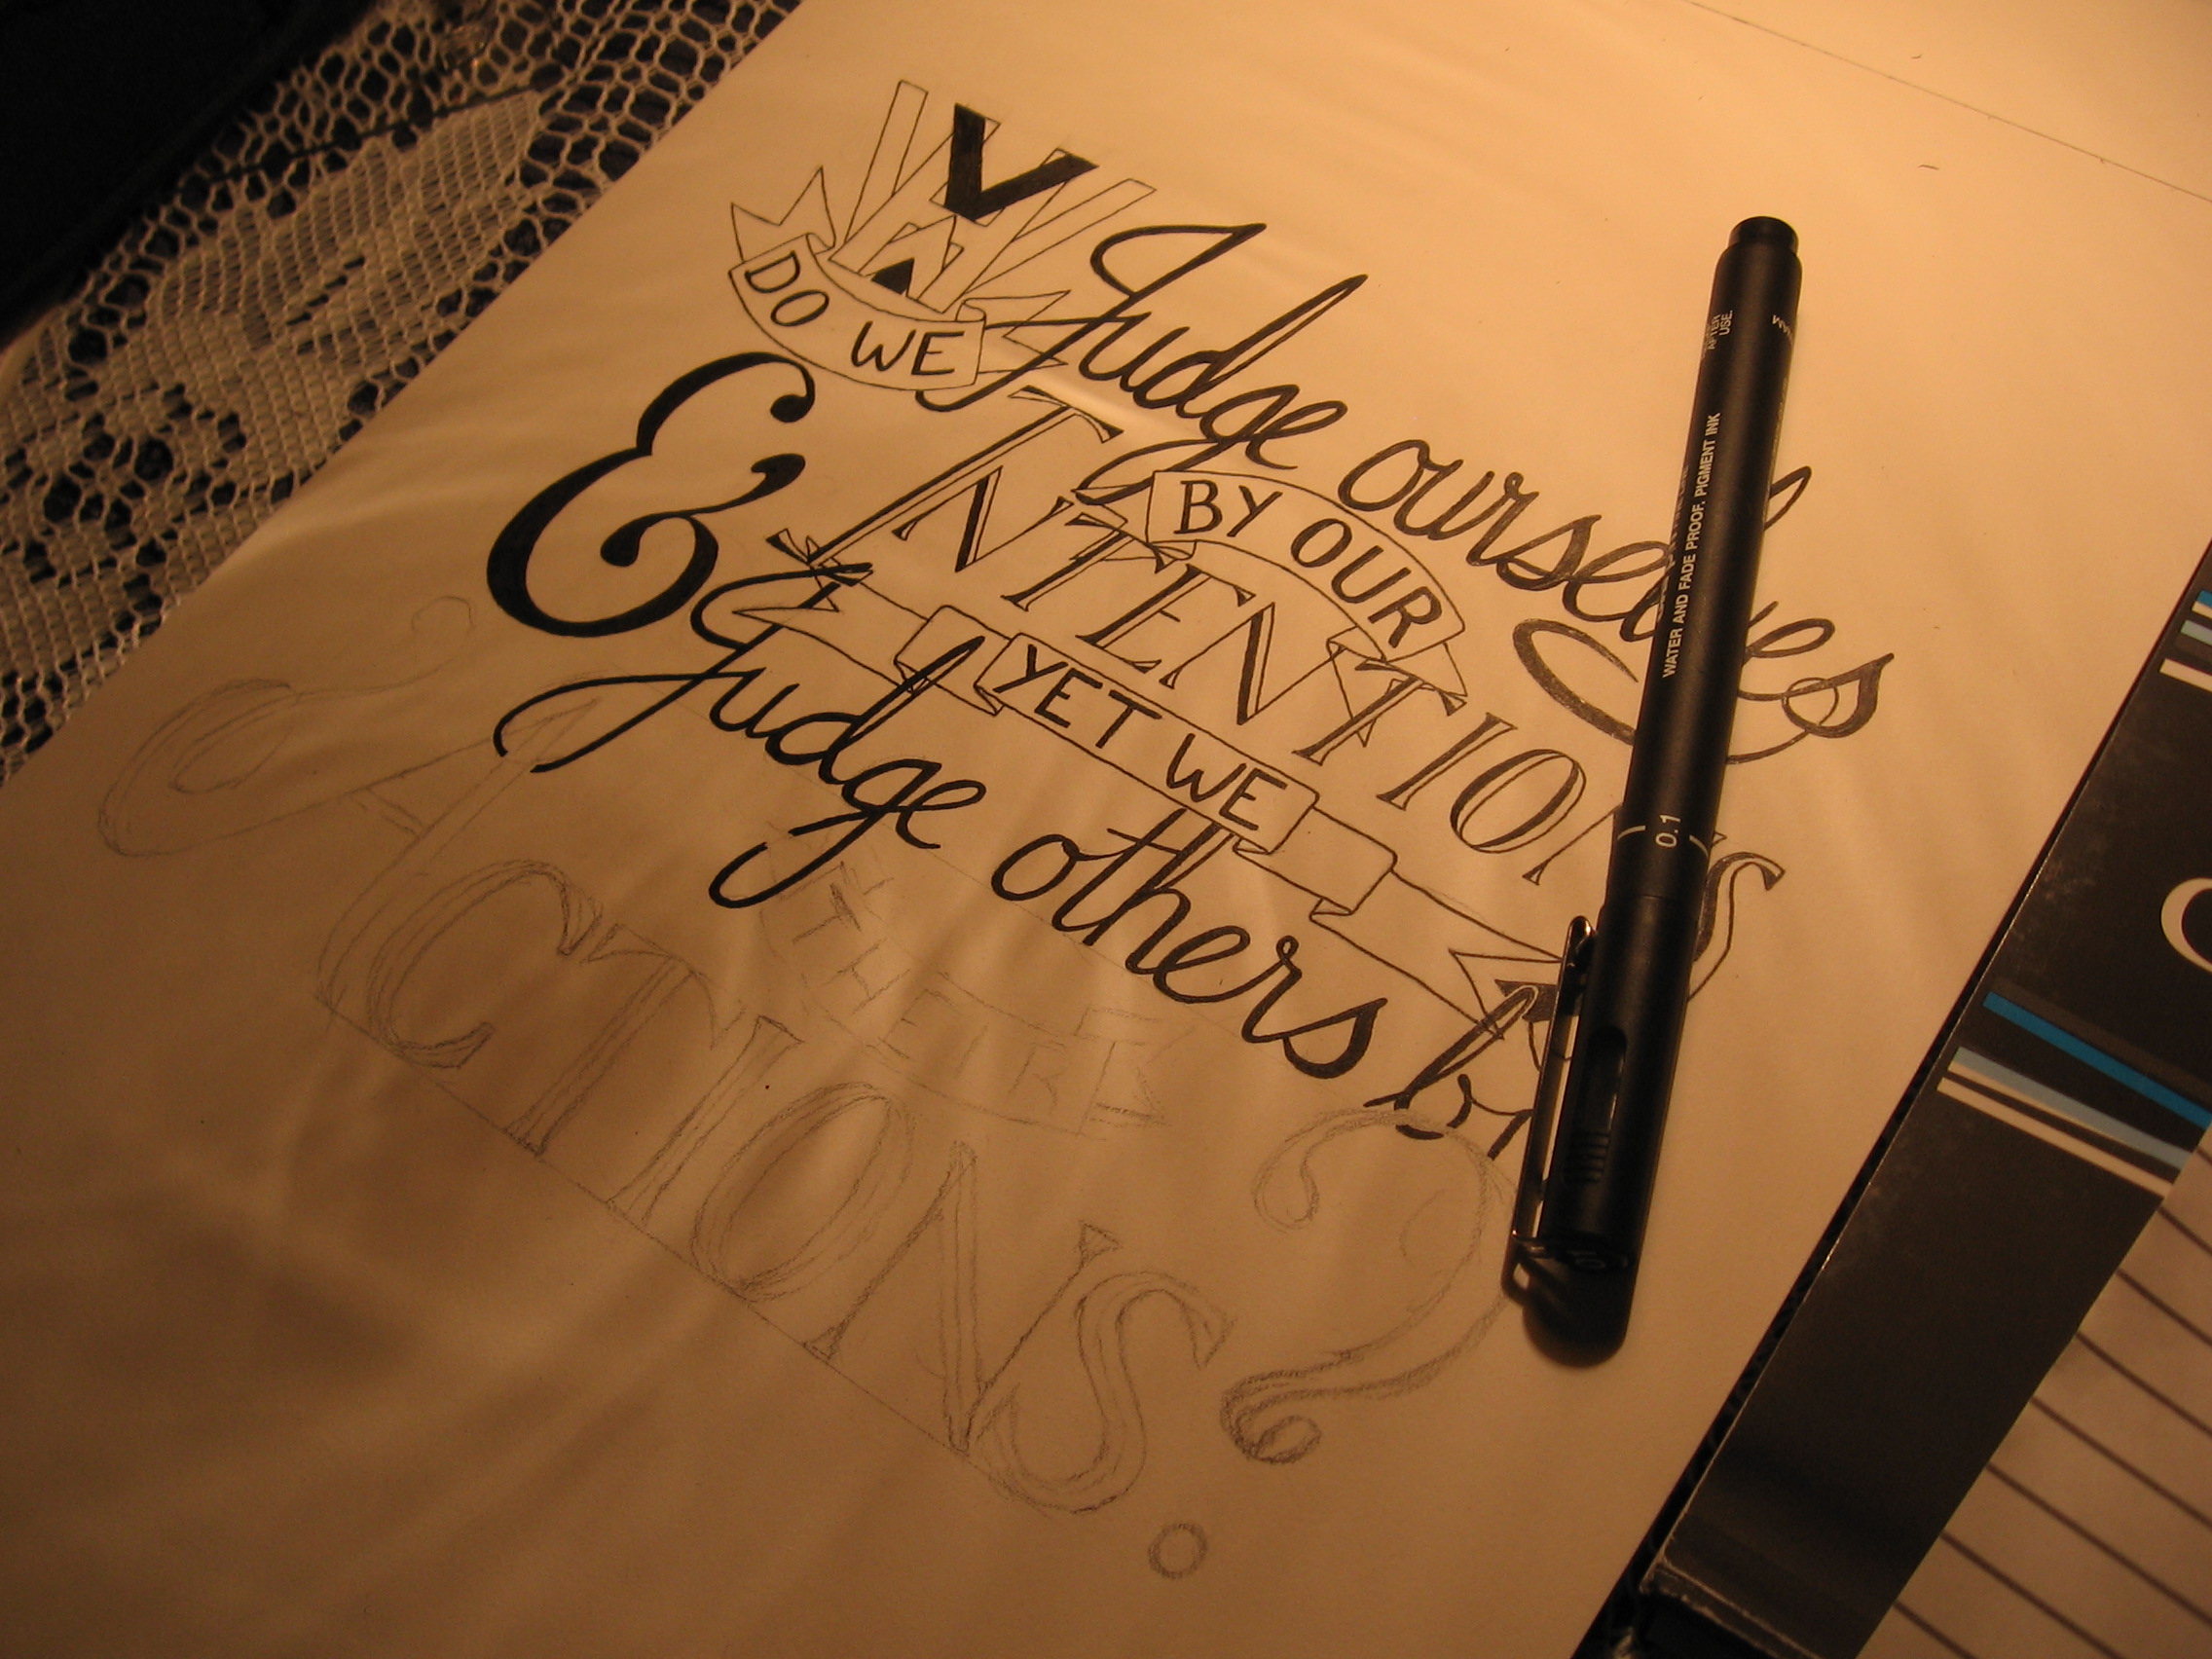
Last week, I did a piece that was part of a Churchill quote. This week, I have done the second half! The two pieces are designed to fit in a square shaped layout, and be displayed next to each other. Eventually (perhaps not next week, but at some point) they will be joined by a third piece which will fit beneath them, being twice as wide as it is high, so that the whole ensemble creates a larger square to complete the whole quotation.

All Will Come Right

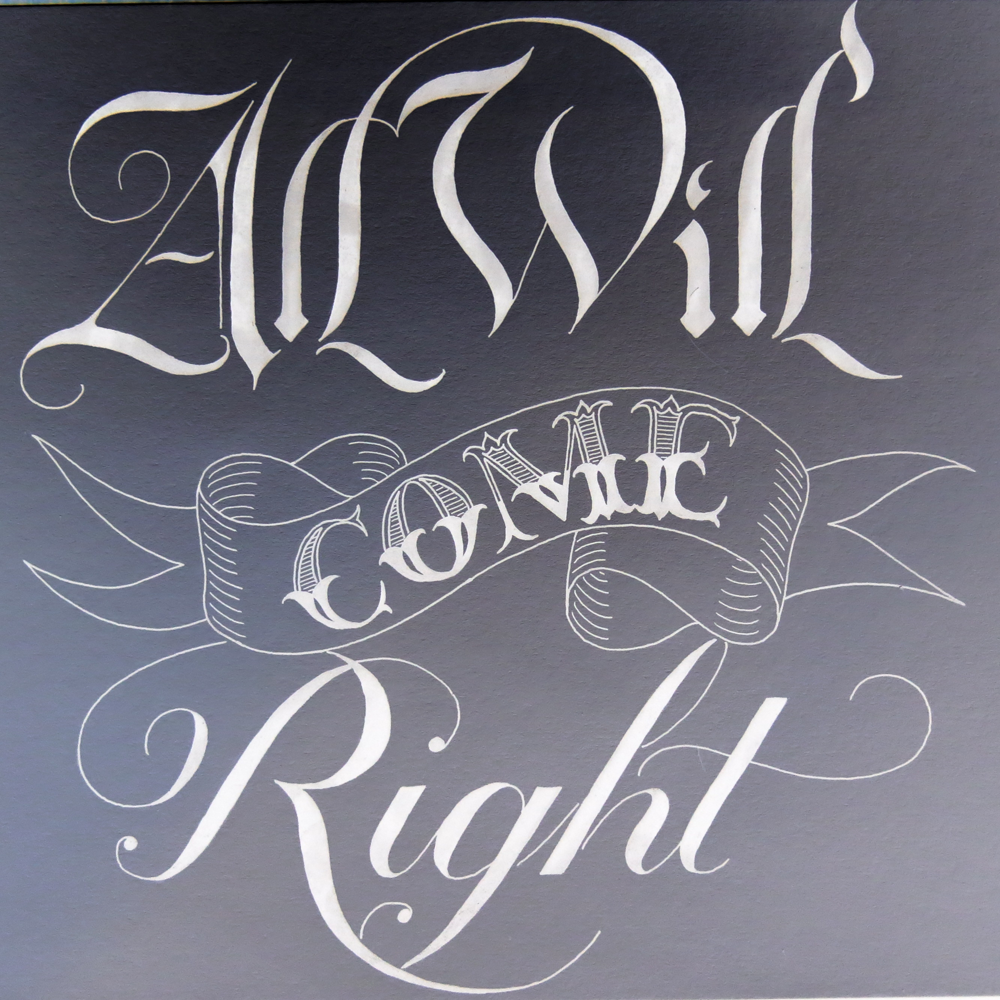
I’ve inverted it here to give it a nice chalk board style look. It’s visually very similar to the piece last week (of course, that’s the point!) so to create a little contrast, I thought it would be nice to see it in white-on-black. It’s so simple to make it a negative, and it almost feels like cheating, because you end up with something that feels so different. Sometimes I see work done by others and I can’t tell if they’ve done it on black paper with chalk or or some other white medium or whether it’s a simple inversion, so it’s interesting to finally get round to doing so with a piece of my own.

Here are the two pieces in the same photo so you can compare:

Lift Up Your Hearts, All Will Come Right

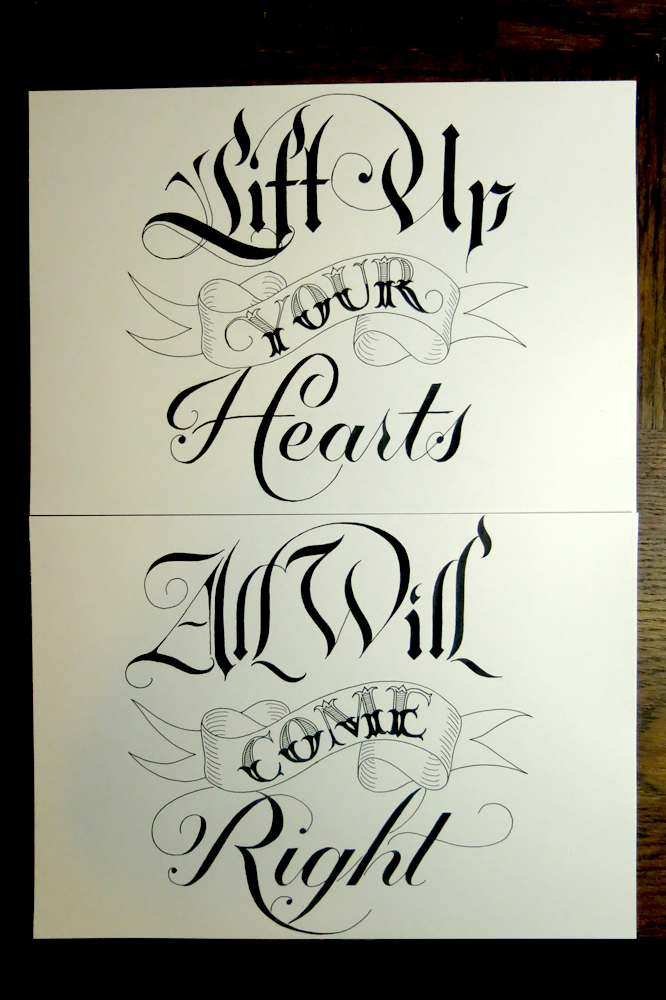
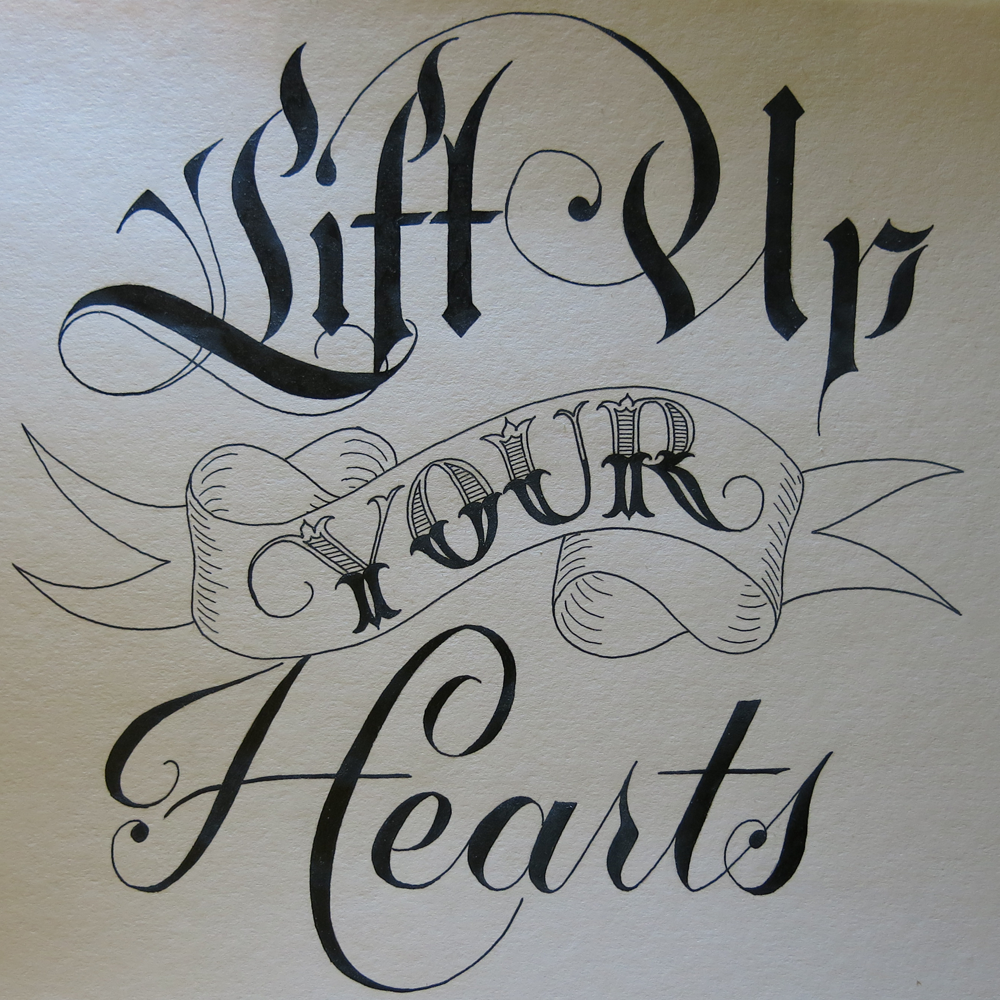
The goal was to make these pieces resemble each other as much as possible. The obvious choice is to have them structured the same, and to used the same styles. Of course, the similar sentence structure is not only useful as a tool of great rhetoric, but also helps with keeping the two pieces the same. It’s simple enough to see that the styles are the same, and that the banner in the middle is the same shape with the same Tuscan font, but there are also a few other structural similarities that I’ve worked into the pieces to keep them consistent. For instance, the underside of the first line swoops down, then up, in order to match the banner beneath it. Both pieces also have a semicircle in the centre at the top, and have a similar shape at the bottom with the leg of the H/R respectively.

Lift Up Your Hearts

Following on from last week, this week has seen a lot of broad nibbed calligraphy practice, which means burning through paper at an alarming rate! The good news is that I bought 20 nice A5 Rhodia notebooks a few weeks ago, half of them with a dot-grid pattern and the other half plain. The dot grid is great for sketching out ideas without having to worry about marking out boundaries and guidelines; unfortunately, the spacing between the dots don’t quite match the width of any of the broad nibbed pens I bought, so it doesn’t help too much with calligraphy practice.

Lift Up Your Hearts

This piece is the first in a two (maybe three) part series that I’m going to do. The plan is to have them structurally as similar as possible. This one is half of a sentence spoken by Winston Churchill on June 12, 1941 in his speech to the Allied Delegates. I first heard it when it gained some popularity due to being auto tuned into a funny little song, but the meaning of the message stuck with me. The full phrase is “Lift up your hearts; all will come right.” It’s then followed with “Out of the depths of sorrow and of sacrifice will be born again the glory of mankind.” It’s stirring to think of the context in which those words were spoken. The Second World War had been going for two years, and would continue for another four. Knowing what we do now lends a feeling of gravity to the words, but I feel it’s a message that holds meaning in many contexts.

Here’s a shot that is a little closer and shows the banner and the Tuscan style lettering of the word “your”.

Lift Up Your Hearts Detail

The piece has quite bold and simple shapes on the top and bottom, so I kept the banner from being too detailed so that it doesn’t distract from other elements, whereas usually I like to include a bit more detail. The main reason I’m keeping it as simple as it is, however, is that for it to work side by side with the next piece in the series, being too detailed could make the composition look too busy. I may make a 3rd piece with the phrase “Out of the depths of sorrow and of sacrifice will be born again again the glory of mankind,” which would be a wider piece to fit beneath the first two above.

The art of war (a rapidograph experiment)

This week I received some new pens which I hope to use in place of the Unipin and Micron fine liners that I’ve been using up until now. These new pens are Rotring Rapidographs, which are a kind of technical pen. What that means is that I won’t have to go out all the time to buy new fine liners, (though of course they will need ink refills,) and I won’t have to worry about the slow blunting of the tip. These pens have a mechanical tip that never dulls, unlike the felt of the fine liners, so barring them being stamped on, they should be just the same in 20 years!

The greatest victory is that which requires no battle

This piece was my first with these new pens aside from a few test scraps to get used to the different feel. I wanted to do a piece that would test out a few different uses for them, including hatching and filling in large sections. In all, they worked out really well, giving very consistent line thickness. The ink seems to be better than that of the fine liners, too, creating a much better matte surface that doesn’t seem to suffer at all from reflecting camera flashes or other lights, leading to great straight shots.

The piece itself is a quotation from the Art of War by Sun Tzu, which seems to contain a lot of wisdom. Though the quote is about victory and battles, coming from a book about war, it has quite a pacifist sentiment to it, which I found quite interesting. Of the quotes I found, this one suited my needs well. I wanted to continue to explore into the world of Gothic lettering, which is something I haven’t examined as closely as other styles, my main areas of study being Roman and Copperplate calligraphy. In this piece, there is a combination of all three! This being my first real quotation piece in a long time, I also wanted to do something with an interesting visual hierarchy so as to make it the kind of thing you might see on a poster.

Take a look at a few progress shots:

IMG_3594

Sketching out the top half after the space was measured out.

IMG_3599

Pencil version complete.

IMG_3600

Half way through inking.

The 4L Boys

Today is the first week on new projects after the Days of the Week series. This week is a piece of lettering based around logo design. The client is a French rock band looking to go pro called The 4L Boys.

The 4L Boys 2

The project consists of making a logo that can be used at a variety of sizes and positions, so the final files will include several far less detailed versions for display on social media sites etc. The aim of the logo was to have the 4L as the centre-piece floating in front of  a diamond shaped road sign that has been eroded away and become rusty. One of my main focuses for this piece was to create a 3D effect to give the feeling that the elements are all suspended around each other. The 4 and L have a small 3D effect, including on the inlay, and also throw a shadow onto the sign behind them to create an illusion of distance. The group also wanted to have banners surrounding the piece with the words “The” and “Boys” written on them. However, for use in different spaces, there will also be another version with the two words set at a more diagonal position in order to reduce the height and increase the width of the logo, in which case the banners will disappear.

I produced the logo as a lettering piece more as a keepsake for the band to have, as the real process of making the logo in all its variants takes place in a largely digital setting. The digital files will be have more of a focus on simplicity and legibility to accommodate for resizing. That means that the detailing on the ribbons and the hatching for the drop shadow will become cleaner and more regular for scalability. Something esle I had to keep in mind for this piece was for it to function completely in black and white. While the band aim to use colour in certain instances, in many cases the logo will rely on being rendered in black and white, or black and yellow.

Be sure to check out more versions of this piece on the logos page once the digital files are completed, which will be in another week or so.

Seeing as I’m no longer doing a project so predictable as the days of the week, it’s not so easy to know what will be up next week! I do, however, have some other client projects to make progress with, but if they don’t come to fruition by next Monday, my goal is to produce a new logo/banner for myself to replace the hasty version I did for the site during my Thing a Day project several months ago. I’m excited to have several ideas already, and to apply the principles I’ve learnt and the skills I’ve gained since making the last logo. I’m thinking it will be a big improvement, so come and check it out!

Sunday

Days! Weeks! Days of the week! I started off idly sketching the word Monday and had the idea for the series. Well, 7 weeks later and it’s finished. Here’s the last one:

Sunday2

Over the course of the weeks, (or the week,) we’ve had brush style, Gothic, typography, flourishes, graffiti, stippling, even an ambigram. My challenge was to create 7 pieces that were as different from each other as possible. The goal was to expand my horizons, learn how to do new things, and explore styles that weren’t just replicas of what I had done in the past. It was tough finding a style for each piece that set it apart from the others, especially towards the end. With this piece, I had exhausted the styles that I was used to doing, which eventually gave me the idea to make something that looked more like a poster. The main difference is that this piece has a lot more non-lettering elements to it. I could have had it with the word just as it is, but seeing as so many lettering pieces are simply the words sitting stark and bare, I wanted to embrace the challenge of deviation from things that are too familiar.

One of the results of having such a detailed piece is that I under estimated the amount of time it took to complete it, meaning I’m a little late in posting it, as it’s just past midnight. Next week, I have some client projects to get working on, so I will either upload some progress, or finished shots of them, or I will get back to doing some pieces that aren’t just single words, like this series has been. Come back and check it out!

Just in case you missed any of the other Days of the Week, here are the rest:

Monday

Tuesday

Wednesday

Thursday

Friday

Saturday


Thing a Day (Day 7)

It’s here. Day 7. I feel like I should have some grand words to write. Some great insight. Instead, I’m sitting here with orange peel on my lap. The good news is that I fixed the computer, so everything should be tip top from now on! The other good news is that I designed AND inked a large piece today, which is more than I had planned, but I thought that finishing the final day with a pencil sketch would be a let down. And the best news is that it’s nearly bed time! I stayed up far too late getting this finished.

Well, anyway, let’s take a look at it.

Fortune favours the bold.

Fortune favours the bold! Or at least, let’s hope it does. And yes, it’s the British spelling of “favour”, what can I say. As for what happened with this piece, I can say that it’s an idea that I had yesterday, and everything was going smoothly until the word “the” became unstuck in time and space and refused to settle back into normality, therefore making it impossible to fit into the design. Fortunately, I had the bright idea of placing it within a ribbon. As you can see, the dots around the edge are to keep it in. Let’s just hope it doesn’t slip out of the end.

Thing a Day. What can I say? It was pretty tough to keep up to my own standards, and it certainly used up vast chunks of time, but I would certainly say that it was worth it. Thing a Day will stop now, and I will upload on a less (but still) frequent basis. It will also give me more time to explore things that are more experimental.

Lastly, I can say that Thing a Day will be back! Sometime in the near future, there will be more things, and more days, and they will go hand in hand.

Thing a Day (Day 1)

Thing a Day (Day 2)

Thing a Day (Day 3)

Thing a Day (Day 4)

Thing a Day (Day 5)

Thing a Day (Day 6)

Thing a Day (Day 1)

So in the spirit of productivity, I’m going to try something one of my favourite musicians and comedians, Jonathan Coulton did. He set himself a challenge to produce 52 things in a year, at a rate of one a week. By things he did not mean full songs, though he did come out with some. He didn’t limit himself to making anything fantastic or polished. He just set himself to making a “thing”. Whether that “thing” was an epic story song or a piece of experimental music depended on what inspiration he managed to find in that week.

My challenge to myself will be shorter, spanning just one week (starting today). Each day I will either plan out a large design (see You will never wait longer for what I mean by large,) ink a large design, or plan and ink a small design.

Well, you say, today is the first day of the challenge, so where is the result? My answer to that is that I’m inking a large design that I planned out yesterday. Here’s my proof!

IMG_1499

As you can tell, my poor old camera doesn’t live up to modern standards, and I certainly need to get a different bulb for my desk lamp (look at those lines it throws!) but the design is well on its way to being completed. My deadline is midnight tonight, so I have another 4 hours to whip it into shape. The finished article will be uploaded by tomorrow, or I’ll have broken my own promise on the first day! And that won’t do.

Thing a Day (Day 2)

Thing a Day (Day 3)

Thing a Day (Day 4)

Thing a Day (Day 5)

Thing a Day (Day 6)

Thing a Day (Day 7)